
Last updated: 17NOV2024 (see Changelog for details)
In this guide we’re going to figure out how to use a combination of screen settings and effects – including shaders, filters, and overlays – to enhance the visual experience of retro handhelds. We’ll mostly focus on the most common screen aspect ratio (4:3) and resolution (640×480) found on handheld devices, but these fundamentals can be applied to a wide variety of screen types.
Note that even though this is a LONG guide, I would still consider it to be a STARTER GUIDE. The whole world of screen effects is both wide and deep, and there are enthusiasts who devote countless hours to designing and tweaking these images to perfection. This guide will walk you through the very basics and give you enough tools to improve your visual experience without earning a PhD in Pixelology.
The majority of this guide will rely on a basic understanding of how RetroArch works — how to enter the RetroArch Quick Menu, and the interplay between configuration files, overrides, and so on. If you need a refresher, I recommend my RetroArch Starter Guide.
Special thanks to community member and GBC game developer Ben Jelter (Jeltron) who helped me conceptualize and package this guide. Be sure to check out his website and some of his video games!
Table of Contents

Size, resolution, and aspect ratio
Integer scaling
Colorization, color correction, and interframe blending
Filters
Shaders
Shimmerless shaders
Overlays
Which approach is best for you?
Some example setups
Special considerations for OnionOS (Miyoo Mini/Plus)
Other OS considerations
My preferred setup for each system
 - Game Boy
 - Game Boy Color
 - Game Boy Advance
 - Pixel-era home console systems
 - 3D-era home console systems
720 x 720 screen settings

Changelog
Size, resolution, and aspect ratio
Three common words or phrases used when describing a display are size, resolution, and aspect ratio.
Size: this is simply the size of the screen, usually measured in inches diagonally. For the purposes of this guide, size doesn’t really matter — it is just how big the display is. It can come into play when discussing pixel density, which is a feature of resolution.
Resolution: this is how many pixels are found on the display. These are measured horizontally and vertically, usually in that order. So the standard 640×480 resolution display we’re going to use in this guide means that we have 640 horizontal pixels, and 480 vertical pixels. In general, the higher resolution the better — that will give the screen a sharper, cleaner look, because of its increased pixel density (or pixels per inch, also known as ppi). A 480p display like we’re using in this guide has a fairly low ppi (228 ppi for 3.5″ displays), requiring additional tricks (like those found in this guide) to balance pixels or improve the overall image. Personally, once I am using a screen that has a 1080p or higher resolution, I generally don’t care much about adjusting the image using shaders or other tricks, because the ppi is so high that it makes it hard to discern any pixel balance issues anyway. As an example, a 5″ 1080p panel will have a ppi of 440, or nearly twice the pixel density of a 3.5″ 480p display.
Aspect ratio: the aspect ratio of a screen will depend on its horizontal and vertical pixels. A 640×480 display has a 4:3 aspect ratio (you can get this figure by turning 640/480 as a fraction and then simplifying that fraction down to 4/3). This is a common aspect ratio for most home console retro systems, since most TVs at the time were 4:3. There are exceptions, especially with handheld systems: GB/GBC were 10:9, and GBA was 3:2. During the PS2 era, TVs with a 16:9 aspect ratio became popular, and that has become the standard TV aspect ratio for home console systems ever since.
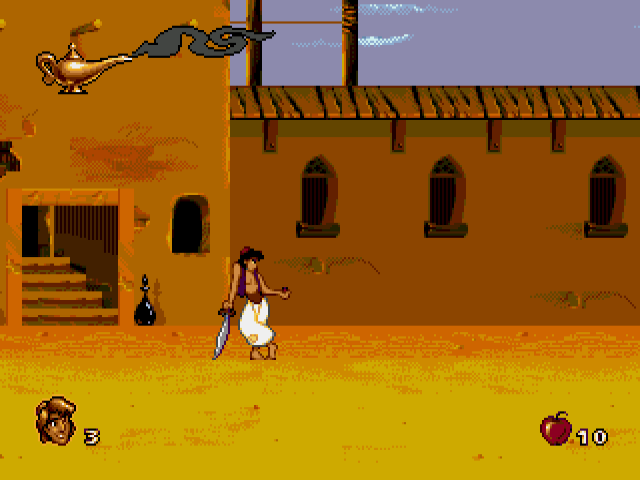
For this guide, we will maintain the aspect ratio of our emulated system. So in the case of GBA, that means we will use a 3:2 aspect ratio, even if that wider aspect ratio does result in natural black bars on the top and bottom. With GB/GBC, we’ll stick with its original (narrower) 10:9 aspect ration, giving us black bars on the left and right. We will take advantage of this empty space with overlays to make the overall image look good anyway. In the case of SNES, we are going to display the image in 4:3, even though some games were originally designed with an 8:7 aspect ratio in mind.
Integer scaling
The term scaling simply means to increase the size of your game image beyond its original resolution. Most people will scale their retro game image to fill the whole screen, but will maintain the original aspect ratio.
Integer scaling refers to scaling the original pixel image to the closest integer (or whole number) scale supported by your screen’s resolution (640×480 in this case). This is done by simple multiplication.
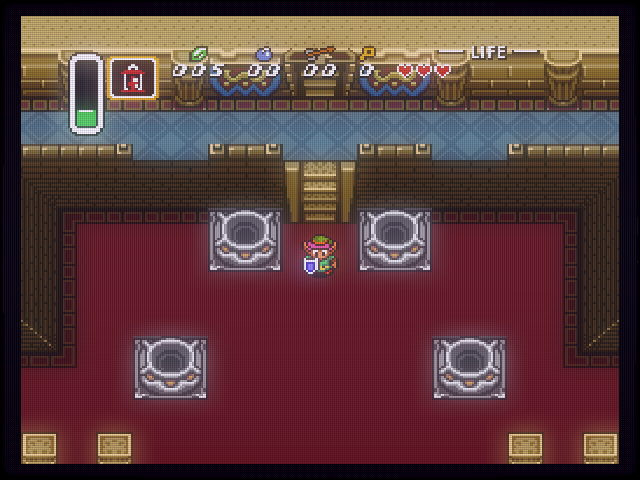
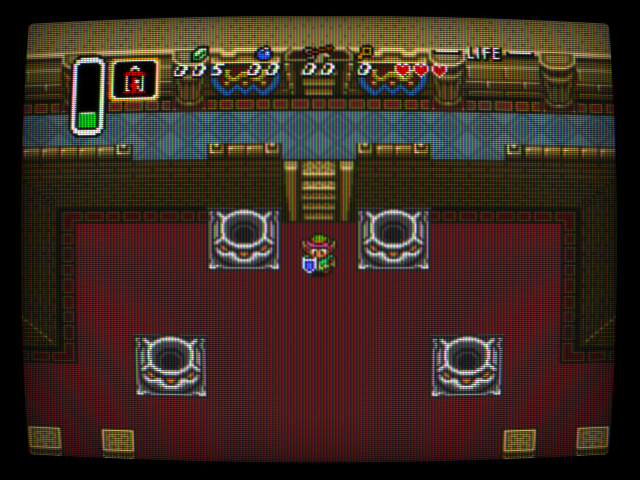
Let’s use Game Boy Advance as an example. The original GBA resolution was 240×160, with an aspect ratio of 3:2. This means that a 2x integer scale is 480×320, and a 3x integer scale is 720×480. Because integer scaling will only scale up to the next whole number, this can sometimes result in a smaller image on your display. When considering our 640×480 display, that means we can only use a 2x integer scale (480×320), since the 640 horizontal pixels on our screen isn’t enough to accommodate the 720 horizontal pixels required to properly show a 3x integer scale. The end result is a small 2x integer scale image, which you can see below — it’s only 2.5″ in size on a 3.5″ display.
In my opinion a 2.5″ 2x integer scale is too small to really enjoy on a 3.5″ display, because it will result in wide black bars on all four sides. So in most cases people will use non-integer scaling to blow up the image to fill up the screen, even if that results in uneven pixels. In the case of GBA on a 480p display, that will give you a 2.7x scale (which you can see above), which is 3.4″ in size. You will still have some black bars on the top and bottom of the screen, but that is expected because the GBA had a wider 3:2 aspect ratio than the 4:3 panel we’re using.
To enable or disable integer scaling, you will want to go into RetroArch Settings > Video > Scaling > Integer Scaling.
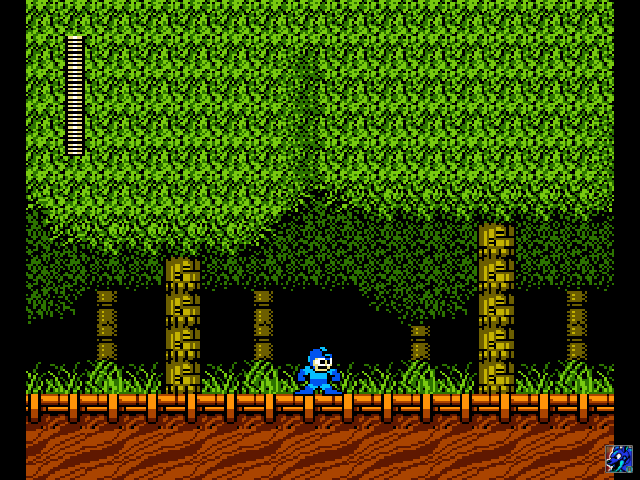
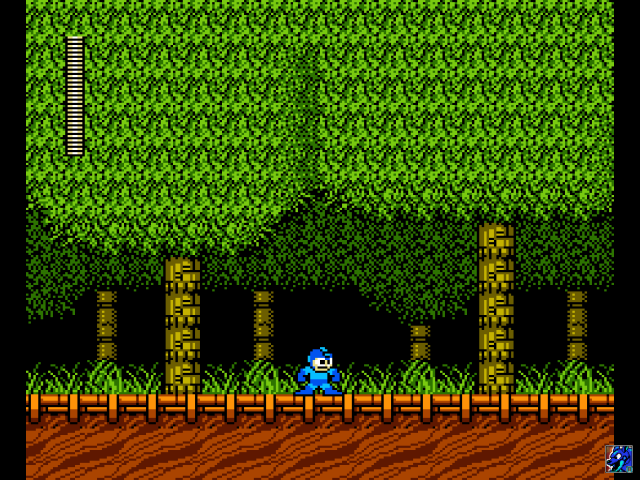
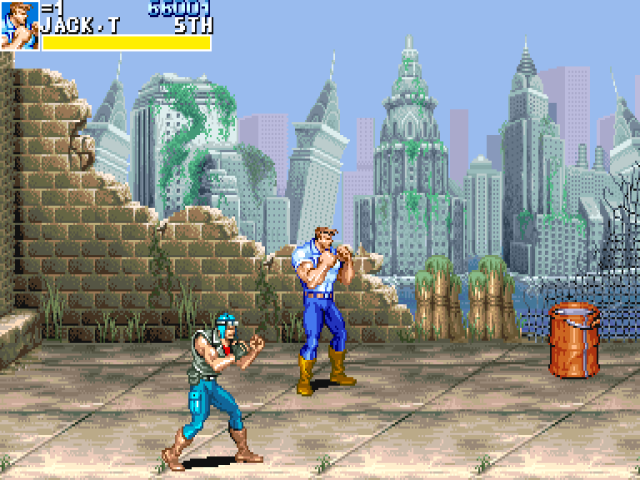
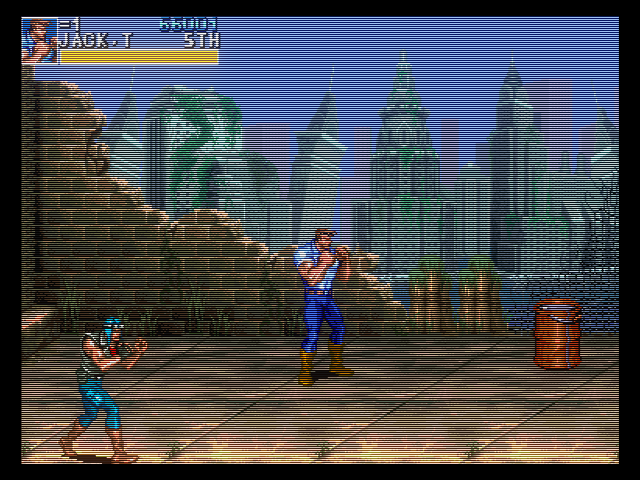
Keep in mind that non-integer scaling can present some issues with pixel balance, meaning that the square pixels in your game image may appear distorted or uneven. Let’s use Mega Man X on the SNES as our example.
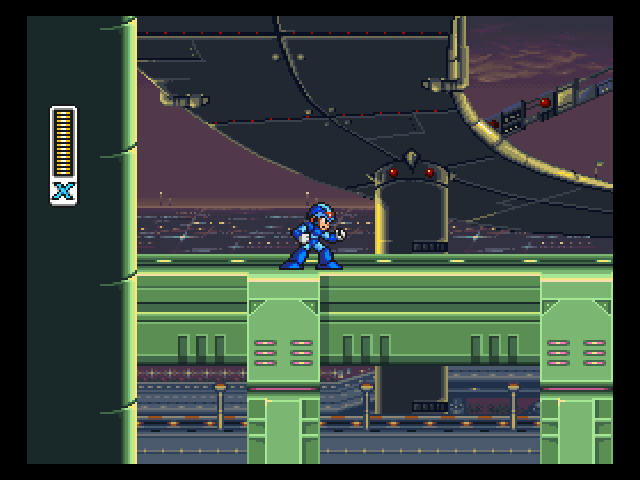
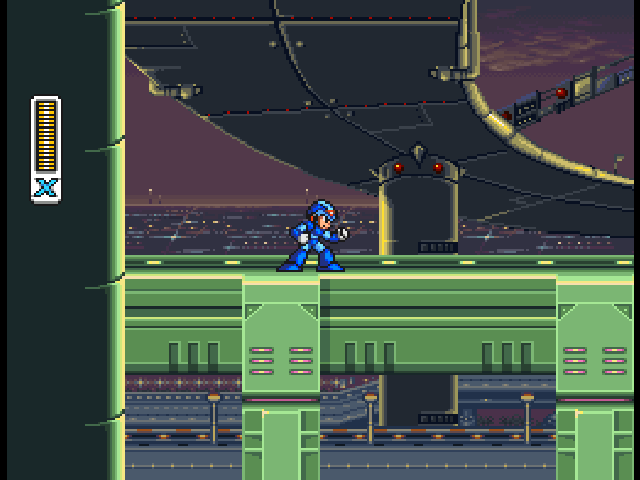
The first image is integer scaled, and you can see that thankfully it’s pretty close to full screen, so you have minimal bars on each side. This will provide a crisp and balanced image that’s just a bit smaller than full screen. Now if you want a full-screen experience, non-integer scaling on our example panel will be a 2.1x scale. The issue is that this non-integer scale presents distorted pixels, which you can clearly see in Mega Man’s life bar. It should have even pellets across the life bar, but instead we have small gaps due to the natural pixel imbalance that comes from non-integer scaling.
For many users, non-integer scaling is just fine — they’d rather see their game in full screen than worry about the pellets on Mega Man’s life bar. And that’s totally cool! But in this guide we’re going to use some tricks to give us a full screen AND balanced pixels, plus some other neat effects.
Some systems naturally support integer scaling on a 480p panel like we’re using in this guide. These systems will give you a full-screen experience and a perfectly-scaled image (note that some games were designed with a unique resolution, so these are general standards per console):
Neo Geo: 320×224 (2x integer scale on 480p panels with small black bars at top and bottom)
Sega Genesis/CD: 320×224 (2x integer scale on 480p panels with small black bars at top and bottom)
Sega Saturn: 320×224 (2x integer scale on 480p panels with small black bars at top and bottom)
Sega 32X: 320×240 (2x integer scale on 480p panels)
Sony PlayStation: 320×240 (2x integer scale on 480p panels)**
Nintendo 64: 320×240 (2x integer scale on 480p panels)**
Sega Dreamcast: 640×480 (1x integer scale on 480p panels)
* Picodrive and Genesis Plus GX cores appear to have different “core-provided” aspect ratios
** Some N64 and PS1 games natively ran at 640×480
In summary, integer scaling is the quickest way to provide a nice, crisp image on your retro handheld screen — the pixels will be perfectly balanced, but will sometimes come at the price of a smaller image on your screen. Non-integer scaling can increase the size of your image, but may have uneven pixels depending on the system.
Colorization, color correction, and interframe blending
Before we get too far into all the ways we can apply screen effects to our game image, there are a few options within each emulator’s core settings. These effects can be used independently of shaders and filters, but will sometimes cause a conflict when used in combination with them. In general I would recommend these as the “first step” towards adjusting your screen image without jumping into shaders, filters, and overlays.
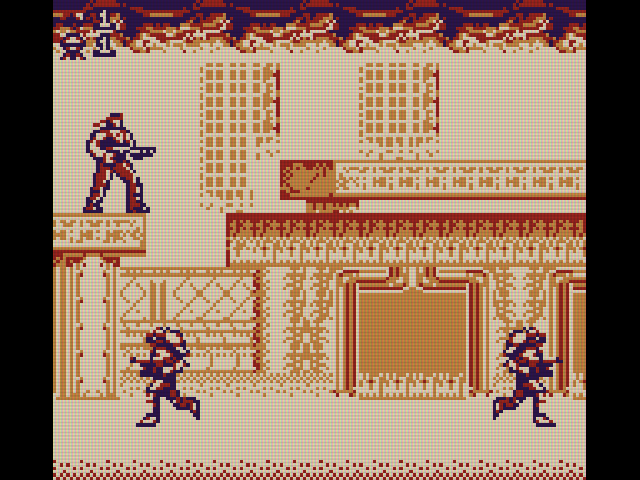
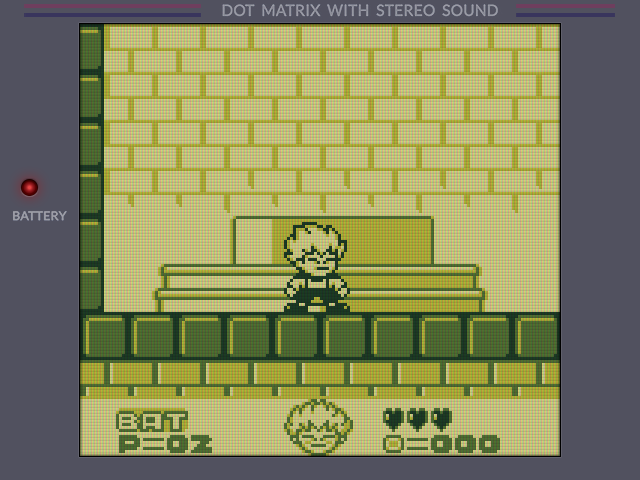
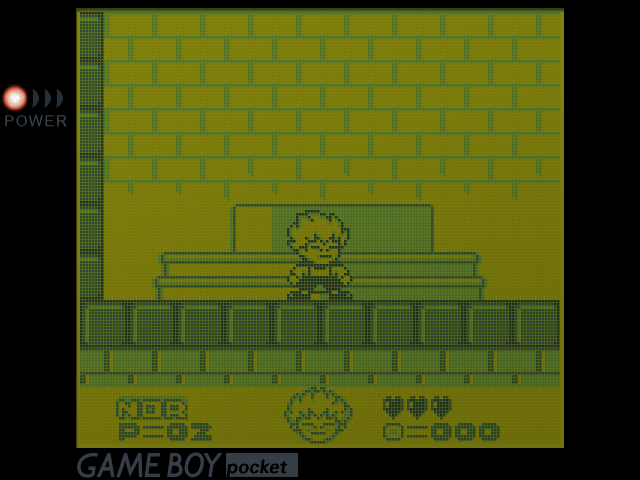
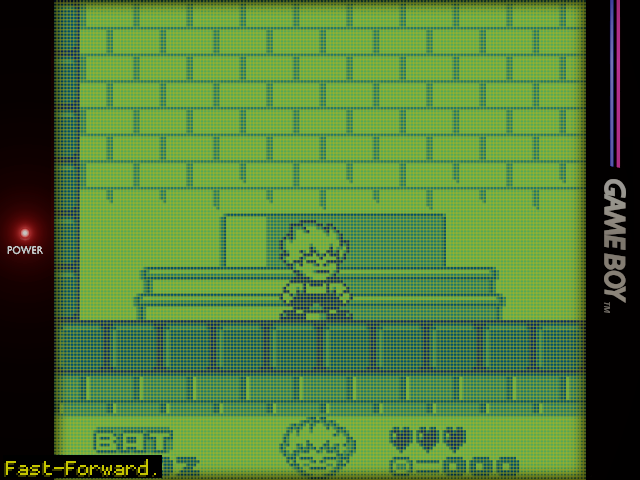
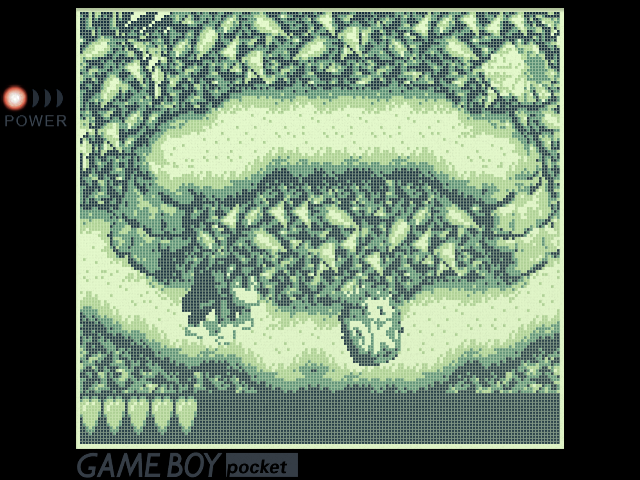
Colorization is used with the original Game Boy to mimic the screens found on those old handhelds. On its own, the Game Boy image is simply grayscale; what we remember as being colored was simply the LCD panel technology at the time (DMG, Pocket, Light, etc).
RetroArch’s primary Game Boy core, Gambatte, provides a number of colorization (also known as color palette) options for Game Boy, so that you can tweak the image to suit your mood. To enable these, start a game, enter the RetroArch Quick Menu, then go into Core Options. Set GB Colorization to Internal, then under Internal Palette, try out some of the options until you find one that works best for you. Once you are happy, you can exit out of the menu and it should auto-save your choice for all future Game Boy games. You can also make more specific saves (like on a per-game basis) via the Quick Menu > Core Options > Manage Core Options menu.
Some of the overlay packs we’ll discuss later in this guide also use their own custom palettes to really lock in the color profile. To load a custom palette, the palette should be named “default.pal” and placed in the RetroArch System (BIOS) folder, in a folder named “palettes”. Most custom OS options have their own BIOS folder, so you would simply place your palettes/default.pal file there, and then under RetroArch Quick Menu > Core Options > GB Colorization, set it to Custom and it will automatically apply your custom palette found in the BIOS folder. Note that due to the limitations of this setup in RetroArch, you can only have one custom color palette at a time.
If you want to go further down the rabbit hole, you can make your own custom Game Boy color palettes. My friend Crystal has a great video about it.
Color correction is another option found within most GBC/GBA emulator cores that will desaturate your LCD screen to better represent the colors as they appeared on original hardware. These are not 100% accurate representations, but may give you an effect that is closer to what you remember.
These color correction options will depend on the emulator core you are using, but in general they can be found within the RetroArch Quick Menu > Core Options section. Gambatte has two options (fast and accurate), which will provide a different look for each game. Once you are happy with your adjustments, you can exit out of the menu and it should auto-save your choice for all future games using that core. You can also make more specific saves (like on a per-game basis) via the Quick Menu > Core Options > Manage Core Options menu.
Finally, interframe blending provides a slight LCD ghosting effect that is similar to what you experienced on old handhelds.
Within Gambatte (for Game Boy and Game Boy Color) you can find the option within RetroArch Quick Menu > Core Options > Interframe Blending. You have three options: Simple, Accurate, and Fast. For mGBA (Game Boy Advance), you it will be found in RetroArch Quick Menu > Core Options > Video > Interframe Blending, with four options: Simple, Smart, Accurate, and Fast.
These effects can also help reduce flickering that result from modern screen’s fast response times (especially with GBA games). For the most part, this setting can be used regardless of shader/filter/overlay, and is sometimes can be used in specific combinations for a more realistic effect. For a demonstration, see the video below, which shows of LCD Ghosting (Accurate), then Interframe Blending OFF, then Simple Interframe Blending.
Filters
Filters are CPU-intensive screen effects that are applied to your image as it is presented on the screen. There are many custom filters available, and the default filters found on RetroArch are pretty great. But bear in mind that because they require CPU power to use, which is what most of our emulation power comes from, it can have a significant performance tax on your device. It may even render some systems unplayable.
There are two major types of filters available within RetroArch. The first is called a bilinear filter, and you can activate it in the Settings > Video > Scaling menu. This is a lightweight filter that can generally be used at any time without any performance tax. This filter will soften hard pixel edges but also balance the pixels, so it works well with non-integer scaling. On its own, I don’t really like this filter, because even though it smooths out the image, it makes the game appear a little too blurry and unfocused. Here is an example:
The bilinear filter can also be applied in combination with other filters to create an improved effect. One of my favorite tricks is to apply BOTH a bilinear filter and the Normal2x filter; the latter can be found in Settings > Video > Video Filter. When used in combination, it will balance pixels and also sharpen the image, giving us something very close to a “best of both worlds” scenario when using non-integer scaling.
Additionally, there are other filters that can be used on their own to provide a retro effect. Some of my favorites include the “Blargg” filters, which are an easy way to apply a TV-like effect to your display. Bear in mind that these filters do have a performance tax, and may not work well with your handheld device.
Filters cannot generally be combined with shaders, which also provide screen effects (we’ll talk more about them in a moment). So I would recommend using filters only if they provide the exact desired effect you’re looking for, or if you are only going to use them in combination with an overlay (we’ll also cover those in a moment!).
If you turn on a filter and like it, you can save it by creating an OVERRIDE. This can be found in the Quick Menu > Overrides > Save Game/Core/Content Directory Override. Game overrides will save the settings for that game only, core overrides will be specific to that emulator core (like Snes9x), and content directory overrides will save for every ROM in that folder (like SNES) regardless of core.
Shaders
Shaders behave much like a filter, but run off the GPU instead of the CPU. This can be advantageous because most emulators rely on CPU power the most, leaving us unused GPU processing power that we can then apply with shaders. The end result is that we can use many shaders without significant performance tax. There are also a LOT of default shaders to choose from, way more than filters, which gives us more options for customizability.
You will often find two types of shaders within RetroArch: GLSL shaders, and SLANG shaders. GLSL shaders are available for OpenGL-supported devices, and are the most common for low-powered retro handhelds. SLANG shaders are newer and more feature-rich, and are compatible with Vulkan, Direct3D, OpenGL, and other renderers. These shaders are generally not available on cheaper retro handhelds, but can be found on modern Android devices and handheld PCs.
If you are installing RetroArch yourself, either on an Android device or on Windows, it’s generally a good idea to update your shaders. You can do that by going to RetroArch’s Main Menu > Online Updater > Update (GLSL/SLANG) Shaders. This only needs to be done that first time, and maybe every once in a while afterwards if you want to make sure you have the latest and greatest shader options.
Shaders are saved in RetroArch by using a PRESET. After loading a game, enter the RetroArch Quick Menu and navigate to the Shaders section. There you can load various shader presets to find the one you like best. Note that after loading a shader, near the bottom of the menu you will have an option to adjust shader parameters. Once you are satisfied with the results, you can choose Save Preset > Save Game/Core/Content Directory Preset. Game presets will save the settings for that game only, core presets will be specific to that emulator core (like Snes9x), and content directory presets will save for every ROM in that folder (like SNES) regardless of core.
A note about KNULLI and shaders: KNULLI is unique in that it allows you to make RetroArch adjustments in their main EmulationStation frontend menu. By default, most systems will have a shader applied already, and if you attempt to save a new shader preset it will be overwritten by KNULLI the next time you start a game. In order to make sure your overlay presets “stick”, you want to turn them off in the EmulationStation menu. To do so, press START to bring up the main menu, then select Game Settings > Game Rendering & Shaders > Shader Set and set it to NONE. Now, when you set a game/core/content directory shader preset, it will save.
ROCKNIX/JELOS is similar in that you can set your shader within the main menu (also found in “Game Settings”), but thankfully they have the entire list of available shaders there, so it’s pretty easy to set up a shader in that menu instead — no need to deal with shader presets!
Personally, I use shaders for three different use cases:
- Interpolation shaders to balance pixels
- Handheld shaders to create an LCD grid effect
- CRT shaders to mimic the feel of an old TV
Each of these shaders can be found in their respective folder, after starting up a game: go to RetroArch Quick Menu > Shaders > Load Preset > GLSL or SLANG > (Interpolation, Handheld, or CRT):
Interpolation shaders will generally balance pixels like you will find with a bilinear filter, but with a sharper overall image output. These shaders are excellent if you want mostly even pixels and a relatively sharp image without the CPU tax that comes from using filters. These shaders can also be combined with overlays to provide balanced pixels, sharp edges, and whatever effect the overlay provides (like bezels or an LCD grid). Some common interpolation shaders include Pixellate, Bandlimit-Pixel, and Sharp-Bilinear-2x-Prescale; these will smooth out the image while remaining relatively sharp.
Note that interpolation shaders can sometimes suffer from “shimmering”, when the image wobbles while scrolling. This can be addressed by manually installing a shimmerless shader, which will be detailed in the next section.
Some of my recommended interpolation shaders:
/pixel-art-scaling/pixel_aa (sharpest)
/pixel-art-scaling/pixel_aa_fast (for low-powered devices like RK3326)
/interpolation/bandlimit-pixel (sharp but slightly demanding)
/interpolation/pixellate
/interpolation/sharp-bilinear-2x-prescale
Handheld shaders can either mimic an original handheld’s screen, or provide more generic results like an LCD grid effect. There are some heavy-duty shaders in this folder, especially those that mimic the specific handheld’s screen, so they may not be a great fit for your handheld because they can negatively affect performance. A common shader to apply for systems like GB/GBC/GBA is LCD3x, which is lightweight and provides a simple LCD grid effect.
Grid shaders will darken the image on your screen. You can either adjust the brightness on your panel, or tweak the shader’s settings via RetroArch Quick Menu > Shaders > Shader Parameters. For many shaders, here you can adjust the Brighten Scanlines or Brighten LCD values until you find the settings that match your panel and tastes.

CRT shaders can provide an excellent visual experience with just one single setting. These are often best used with emulated home console systems, because they often provide a scanline effect, slight image softening, and the natural blooming that comes from playing on a CRT television. Some will even include a natural curvature to mimic old TVs!
But keep in mind that CRT shaders generally require integer scaling to properly show scanlines and other effects — some, like the CRT-Consumer (SLANG) shader, can often look fine with non-integer scaling. Unfortunately, some of the really impressive CRT shaders (like CRT-Consumer) require a lot of performance power, and so they are limited to more powerful 4:3 handhelds like the Retroid Pocket 2S or Anbernic RG405M.
Some of my recommended CRT shaders:
/crt/crt-1tap (light effect)
/crt/crt-blurPi (light effect, supports non-integer scaling)
/crt/zfast-crt-geo-svideo (dramatic effect)
/crt/consumer (demanding)
One last note: shaders can be manipulated well beyond just finding the right one to match your needs. They can be stacked on top of one another — like using a bloom shader appended by a CRT or scanline shader. Additionally, within the shaders menu there is an option called Shader Parameters — this will allow you to adjust the shader to better suit your mood.
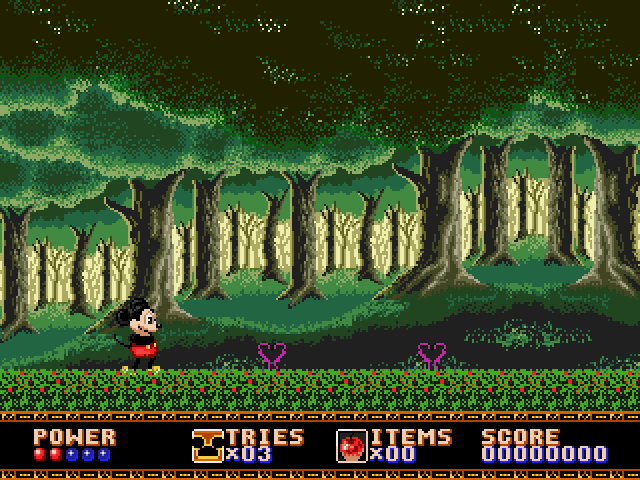
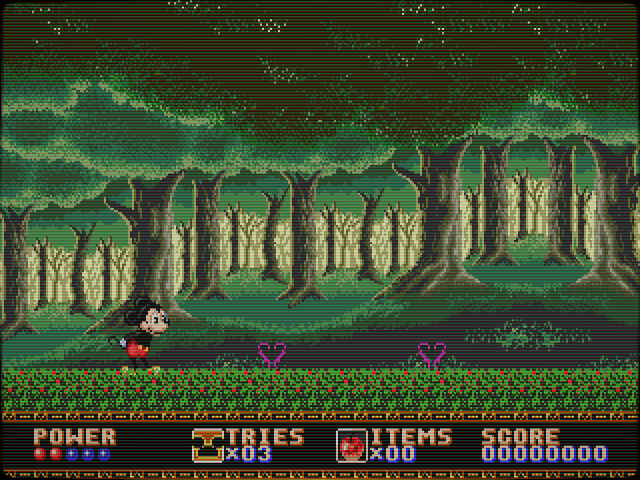
Shimmerless shaders
Many interpolation shaders will suffer from an effect called “shimmering”, where the image has a slight wobbling effect when the screen is scrolling. This is hard to see on most handhelds due to their small screens. There is a shader that minimizes this issue, but it is not installed with RetroArch by default. Instead, you will have to manually install this shader (note that it is already pre-installed on some custom OS options, like muOS and GammaOS, as detailed below). Below are instructions on how to get it directly from the author’s GitHub page, but I’ve also included it in the RGC Overlay Pack at the end of this guide, along with other shaders, overlays, and palettes that may be of use.
You can see some shimmering in the trees with the first shader
- Head over to this GitHub page, and then click on the green “<> Code” button, and select “Download ZIP”.
- Once downloaded, unzip the file and you will find two folders: shaders_glsl and shaders_slang.
- Choose the folder that corresponds to the shaders your device uses (generally it will be GLSL for low-powered Linux handhelds, and SLANG for Android).
- Now you want to add this folder to your device. You can really place it anywhere as long as you navigate to it within RetroArch, but I prefer to put it in a standard RetroArch folder for easy access. That location will depend on the operating system you are using.
Shader locations on popular custom firmwares (click to expand)
Anbernic stock RG*XX firmware (GLSL): the shaders location is within the SD card’s Linux partition (/mnt/vendor/deep/retro/shaders), which is not easy to access. You could place them on your microSD card manually and then move them over using the File Manager app pre-installed on your stock OS. For the easiest method, I recommend placing the shaders on the SD card’s main Windows (“NO NAME”) partition, in the folder named “anbernic” (make a subfolder named “shaders” and put them there). Then navigate to that location when choosing your shaders, which will be /mnt/sdcard/anbernic/shaders/
KNULLI (GLSL): shaders on KNULLI are tricky. There is a bug in RetroArch where it won’t see your shaders unless you navigate to a specific folder first (yeah it’s weird). Instructions are provided in the Other OS Considerations section below, and you can read more about it in the KNULLI wiki.
muOS (GLSL): the sharp shimmerless shader is already pre-installed on this OS (and pre-configured with many systems), but you can find the shaders folder on your SD card at MUOS/retroarch/shaders.
ArkOS (GLSL): these shaders are found in /home/ARK/.config/RetroArch/shaders, which is found within the Linux partition. You can either connect to your device via SFTP to locate that folder, or you could just make a “shaders” folder on the EASYROMS partition of your microSD card and add the shader there, and navigate to it within the RetroArch menu.
ROCKNIX/JELOS (GLSL): shaders are found in tmp/shaders, located within the Linux partition. You can either connect to your device via SFTP to locate that folder, or you could just make a “shaders” folder in the storage/roms section of your microSD card and add the shader there, and navigate to it within the RetroArch menu.
CrossMixOS (GLSL): the sharp shimmerless shader is already pre-installed on this OS, but you can find the shaders folder on your SD1 card at RetroArch > .retroarch > shaders. Note you will need to have hidden files and folders visible on your PC in order to see the .retroarch folder.
Android (SLANG or GLSL): the shaders folder is located within the internal Android filesystem, which can be difficult to access depending on your file management app and your Android version. To make it easier, I recommend storing your shaders in the userspace section of Android, which is easy to access and write into. This location is (internal storage)/RetroArch, and you can make a shaders folder and place the shaders in there. Because Android can often use either SLANG or GLSL shaders, I recommend adding both to that folder and trying them out to see which works best for you. If you are using the GammaOS version of Android, it will have the sharp shimmerless shader pre-installed.
One you have it installed on your device, open up a game then select RA Quick Menu > Shaders > Load Preset and navigate to its location. I generally just use the standard sharp-shimmerless shader, but you can experiment with the bgr/rgb (and vgbr/vrgb for vertical games) which support subpixel rendering by each color profile.
Once you are satisfied with the results, you can choose Save Preset > Save Game/Core/Content Directory Preset. Game presets will save the settings for that game only, core presets will be specific to that emulator core (like Snes9x), and content directory presets will save for every ROM in that folder (like SNES) regardless of core.
Overlays
The last major effects you can apply on your handheld screen overlays. While these can make a variety of changes to your game image, I like to think of them as “textures” that complement the rest of your effects. Some of the more common overlays will provide bezels to cover up any black bars on your screen, or scanline/grid effects that can be placed on top of your shader or filter effect. We’ll talk more about combining these effects in the next section.
RetroArch comes with some pre-installed overlays, but they are limited and mostly focused on 16:9 aspect ratio devices. On Android and iOS, there will be a touchscreen controller overlay turned on by default.
Like with shaders, custom overlays are stored in various locations depending on the operating system you are using.
Overlay locations on popular custom firmwares (click to expand)
Anbernic stock RG*XX firmware: the overlays are found on the stock OS microSD card, in the anbernic/bezels folder.
KNULLI: overlays are located on the SHARE partition of your SD card, in the system/configs/retroarch/overlays folder. If you are using the default EXT4 file system on your KNULLI build, then you can access this folder through a wireless SAMBA (SMB) share as described in the KNULLI wiki.
muOS: you can find the overlays folder on your SD1 card at MUOS/retroarch/overlays.
ArkOS: these overlays are found in /home/ARK/.config/RetroArch/overlay, which is found within the Linux partition. You can either connect to your device via SFTP to locate that folder, or you could just make an “overlays” folder on the EASYROMS partition of your microSD card and add overlays there, and navigate to it within the RetroArch menu.
ROCKNIX/JELOS: overlays are found in tmp/overlays, located within the Linux partition. You can either connect to your device via SFTP to locate that folder, or you could just make an “overlays” folder in the storage/roms section of your microSD card and add overlays there, and navigate to it within the RetroArch menu.
OnionOS: this OS runs a special version of RetroArch with optimizations and bug fixes to improve the visual experience compared to the standard version of RetroArch. It has a large collection of overlays pre-installed, which can be found in RetroArch/.retroarch/overlays. Note you will need to have hidden files and folders visible on your PC in order to see the .retroarch folder.
CrossMixOS: you can find the overlays folder on your SD card at RetroArch > .retroarch > overlay. Note you will need to have hidden files and folders visible on your PC in order to see the .retroarch folder. Because the TrimUI Smart Pro is a 16:9 system, most of the overlay options presented in this guide won’t apply (as they are designed with 4:3 displays in mind).
Spruce (Miyoo A30): you can find the overlays folder on your SD card at RetroArch > .retroarch > overlay. Note you will need to have hidden files and folders visible on your PC in order to see the .retroarch folder. Spruce comes pre-loaded with community overlays from drkrse, Jeltron, and Onion. Note that due the Miyoo A30’s relatively dim screen, I would suggest using non-grid overlays or a lighter opacity.
Android: the overlays folder is located within the internal Android filesystem, which can be difficult to access depending on your file management app and your Android version. To make it easier, I recommend storing your overlays in the userspace section of Android, which is easy to access and write into. This location is (internal storage)/RetroArch, and you can make an overlays folder and place the overlays in there.
To set up overlays, open up a game then select RA Quick Menu > On-Screen Overlay > Display Overlay > ON. Then, under Overlay Preset, navigate to the overlay you want to apply. Once selected, you can adjust some parameters like its opacity (some are designed to be used at a 0.70 opacity, others up to 1.00). After you have found an overlay that you like, you can save it as a Core, Content Directory, or Game Override.
Because most of the default overlays found in RetroArch are created with 16:9 displays in mind, community artists and developers have made several packs specific for 4:3 480p displays. Some are already pre-installed on certain operating systems, like muOS. Here are some of the most popular options:
- Jeltron’s Retro Overlays: these were primarily made with the Miyoo Mini Plus in mind, but they will work well with most other screens.
- Perfect Overlays: these were collected by mugwomp93, and adapted from 1playerinsertcoin’s work (full profile here).
- drkhrse Miyoo Bezels: these were also made with the Miyoo Mini Plus’ 480p screen in mind, but will work on other devices.
- RetroArch Perfect Overlays: this collection adapts both mugwomp93 and drkhrse’s work into one package.
These overlay packs have instructions either on their respective GitHub pages, or found in readme files inside of the pack. Be sure to follow their instructions for the optimal results!
If you turn on an overlay and like it, you can save it by creating an OVERRIDE. This can be found in the Quick Menu > Overrides > Save Game/Core/Content Directory Override. Game overrides will save the settings for that game only, core overrides will be specific to that emulator core (like Snes9x), and content directory overrides will save for every ROM in that folder (like SNES) regardless of core.
Which approach is best for you?
Now that we understand each screen effect and what they can do, let’s talk about applying each of these tools to reach your desired effect.
To start, you have to determine what sort of gaming experience you want when playing these retro games. You can generally classify your desired effect into three categories (thanks to Jeltron for the categorization help):
Modern pixels: this style generally uses minimal effects but focuses on having accurate, square pixels (sometimes referred to as “crispy”). This category is often associated with a clean integer scaling look, and maybe a light grid shader or overlay to complement the sharp textures. This isn’t necessarily how these consoles originally looked, especially on home console (CRT) systems, but they can look very crisp and chunky, which gives a retro vibe. A modern example would be recent pixel art RPGs like the Octopath Traveler series; you could even add a slight bloom shader to mimic those modern RPGs even more.
Also in this category would be interpolation shaders, which allow you to use non-integer scaling with a similarly balanced result (but not 100% crispy). In general, this is the closest you can get to a “pure/raw” (albeit not historically representative) look, and this is often what I demonstrate in my videos.
Upscaled image: this category uses shader and filter effects to create an “HD Remaster” look, similar to what you can find in some remastered releases from Square-Enix. These images will be rounded and inky looking, almost like a watercolor painting. While not traditional by any stretch, these can carry a unique look to your games and overshadow any pixel balance issues as well.
Pseudo authentic: this category applies any combination of shaders, filters, and overlays designed to recreate the original image on CRT televisions and original handheld console hardware. This type of approach will often make home console and arcade games look less pixelated but with more depth, just as they did on TVs at the time. For handheld systems, this category will focus on colorization, overlay borders, and LCD grids to enhance the immersive quality of playing handheld games on a handheld emulation device. Note that the most impressive shaders, like those within the Royale category, are too demanding for most retro handhelds; we’ll stick with more lightweight options in this guide.
Note that this category in particular can get extremely deep and complex, and many of the more heavy-duty shader effects require more power than most cheap retro handhelds can provide. But near the end of this guide I’ll show off some of my favorite examples that will work just fine on most handhelds today.
Some example setups
Let’s go through some common systems and scenarios to give you examples of what you can apply depending on your preferences. Note that these are only examples to show the range of choices you have available, to help narrow down what you prefer.
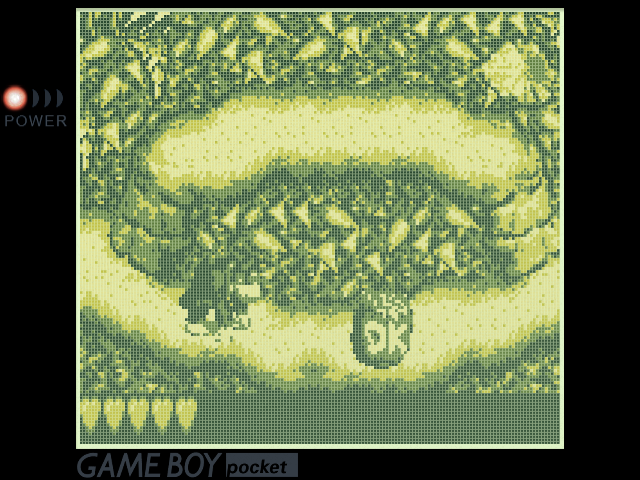
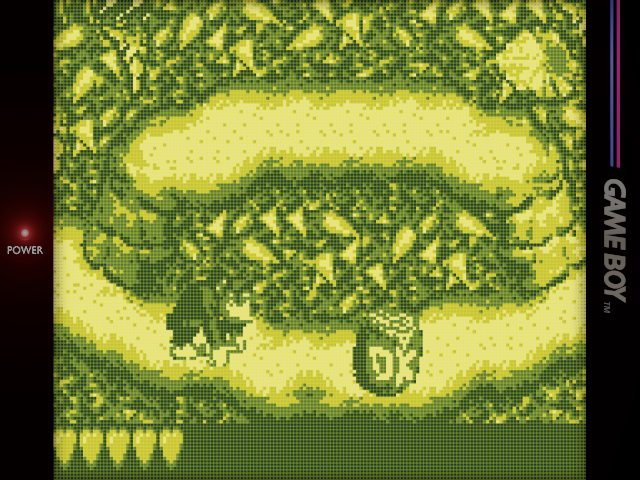
Example 2: Integer scaling, image offset, Jeltron DMG overlay, DMG Essentials color palette
Example 3: Non-integer scaling, “Perfect” overlay, sharp shimmerless shader, custom DMG color palette
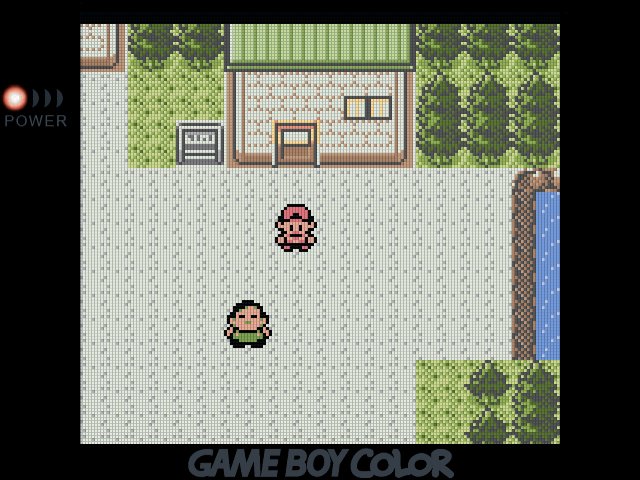
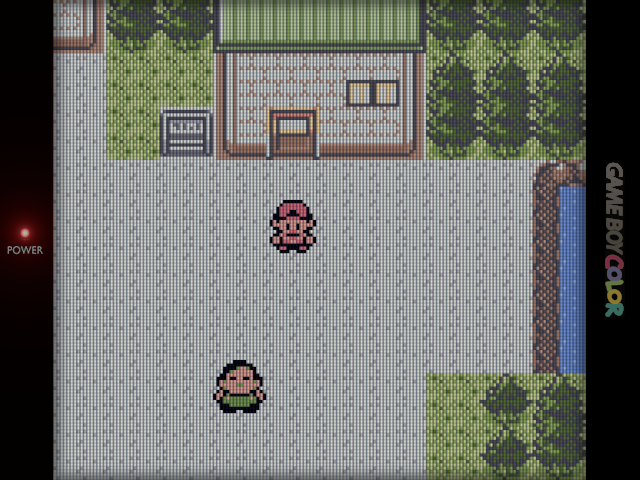
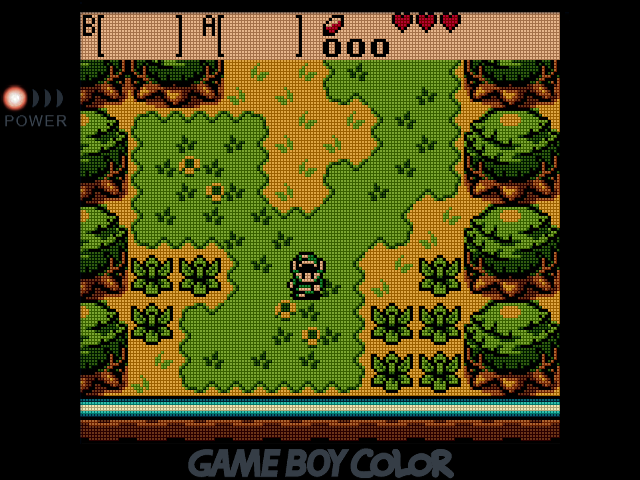
Game Boy
There are many different configurations when it comes to Game Boy screen effects. For these examples I focused on options that provide a more DMG-centered look, but you can get similar results with other Game Boy versions, like the Light and Pocket models. The first example uses integer scaling and a DMG-style overlay and Gambatte’s own Special 1 color palette; the GB image is only slightly smaller than it was on an original DMG Game Boy when using a 3.5″ screen. The second example combines Jeltron’s overlay and custom palette (note that this palette is unique to OnionOS on the Miyoo Mini/Plus devices), if using something else Jeltron recommends a PixelShift palette (explained here). The third example is using a custom overlay and palette from the “Perfect” pack, with non-integer scaling to make the image as large as possible.
Example 1: Integer scaling, drkhrse GB int overlay, Special 1 colorization
Go to Settings > Video > Scaling and turn Integer Scaling ON. Install the drkhrse overlay pack as described above, then go to Quick Menu > On-Screen Overlay > Overlay Preset and choose the DMG int overlay from the drkhrse folder. Finally, go to Quick Menu > Core Options > GB Colorization and set it to Internal, and set the Internal Palette to Special 1. Once you are happy with the outcome, go to Overrides > Save Content Directory Overrides
Example 2: Integer scaling, image offset, Jeltron DMG overlay, DMG Essentials color palette
This example requires a combination of overlay and color palette available from Jeltron’s repository. That same repo has instructions on how to set each of them up, and the overlay pack also contains a readme file. Follow those instructions to configure the integer scaling, custom aspect ratio (for image offset that matches the overlay), on-screen overlay, and color palette. Note that the image above is taken from the Miyoo Mini Plus running OnionOS, which has its own custom palettes and special RetroArch configuration, so it may not look the same on other devices.
Example 3: Non-integer scaling, “Perfect” overlay, sharp shimmerless shader, custom DMG color palette
This example requires a combination overlay and color palette available from mugwomp93’s repository (adapted from 1playerinsertcoin). When downloading this pack, there will be readme files inside with instructions for each system. Follow those instructions to configure the on-screen overlay and custom color palette. Once complete, install the sharp-shimmerless shader as explained in the above section, then go to Quick Menu > Shaders > Load Preset and find your sharp-shimmerless shader. Now, go to Shaders > Save Preset > Save Content Directory Preset, then back in the Quick Menu select Overrides > Save Content Directory Override
Example 2: Integer scaling, image offset, Jeltron GBC overlay, fast color correction
Example 3: Non-integer scaling, Perfect Overlay (0.70 opacity), sharp shimmerless shader, fast color correction
Game Boy Color
Game Boy Color is also full of various options, and in these examples I tried to stay as true to a “realistic” experience without diving too far into special configurations. The first example is the simplest, with non-integer scaling and a GBC color shader instead of Gambatte’s default color correction. The second option is more thorough: it includes integer scaling, a slight offset to account for Jeltron’s overlay, and fast color for a slightly desaturated look. Finally, the third example is a middle ground between the other two, with non-integer scaling (and a shimmerless shader to balance pixels), then an overlay and fast color correction.
Example 1: Non-integer scaling, GBC color shader, no color correction
Go to Settings > Video > Scaling and turn Integer Scaling OFF. Next, go to RetroArch Quick Menu > Core Options > Color Correction > OFF. Then go back to Quick Menu and navigate to Shaders > Load Preset > GLSL/SLAND > Handheld > gbc-color. Once satisfied, go to Shaders > Save Preset > Save Content Directory Preset, then Overrides > Save Content Directory Override
Example 2: Integer scaling, image offset, Jeltron GBC overlay, fast color correction
This example requires an overlay available from Jeltron’s repository. That same repo has instructions and the overlay pack also contains a readme file. Follow those instructions to configure the integer scaling, custom aspect ratio (for image offset that matches the overlay), and on-screen overlay. From there, go into RetroArch Quick Menu > Core Options > Color Correction > ON, and set the Color Correction Mode to Fast or Accurate depending on your tastes (or turn it OFF for saturated colors). Once satisfied, go to Quick Menu > Overrides > Save Content Directory Override
Example 3: Non-integer scaling, Perfect Overlay (0.70 opacity), sharp shimmerless shader, fast color correction
This example requires an overlay available from mugwomp93’s repository (adapted from 1playerinsertcoin).. When downloading this pack, there will be readme files inside with instructions for each system. Follow those instructions to configure the on-screen overlay (I personally prefer a 0.70 overlay opacity with this one). Once complete, install the sharp-shimmerless shader on your device as explained in the above section, then go to Quick Menu > Shaders > Load Preset and find your sharp-shimmerless shader. Now, go to Shaders > Save Preset > Save Content Directory Preset, then back in the Quick Menu select Overrides > Save Content Directory Override

Example 2: Non-integer scaling, image offset, Jeltron GBA overlay, sharp shimmerless shader
Example 3: Non-integer scaling, Perfect 75% GBA bright overlay, sharp shimmerless shader
Game Boy Advance
As mentioned previously, the Game Boy Advance image is small when applying an integer scale, so I prefer to use non-integer scaling and then a combination of interpolation (or shimmerless) shader and an LCD grid overlay to create an image that is mostly balanced. It might not hold up under a microscope, but the results look spectacular to the human eye. Our first example is a simple LCD3x shader, which will give you the most uneven pixels with a grid effect. The second example includes the sharp shimmerless shader to balance pixels, which are then textured with Jeltron’s GBA overlay for a grid effect. In the third example, we have the same approach but with the “Perfect” overlay instead, which has a nice reflective color on the GBA logo.
Example 1: Non-integer scaling, LCD3x shader
Start up a game, then enter the RetroArch Quick Menu and select Shaders > Load Preset > GLSL/SLANG > Handheld > LCD3x. Once satisfied, go to Shaders > Save Preset > Save Content Directory Preset, then Overrides > Save Core Override
Example 2: Non-integer scaling, image offset, Jeltron GBA overlay, sharp shimmerless shader
This example requires an overlay available from Jeltron’s repository. That same repo has instructions and the overlay pack also contains a readme file. Follow those instructions to configure the custom aspect ratio (for image offset that matches the overlay) and on-screen overlay. Once complete, install the sharp-shimmerless shader on your device as explained in the above section, then go to Quick Menu > Shaders > Load Preset and find your sharp-shimmerless shader. Now, go to Shaders > Save Preset > Save Content Directory Preset, then back in the Quick Menu select Overrides > Save Content Directory Override
Example 3: Non-integer scaling, Perfect 75% GBA bright overlay, sharp shimmerless shader
This example requires an overlay available from mugwomp93’s repository (adapted from 1playerinsertcoin).. When downloading this pack, there will be readme files inside with instructions for each system. Follow those instructions to configure the on-screen overlay (I personally prefer a 0.70 overlay opacity with this one). Once complete, install the sharp-shimmerless shader on your device as explained in the above section, then go to Quick Menu > Shaders > Load Preset and find your sharp-shimmerless shader. Now, go to Shaders > Save Preset > Save Content Directory Preset, then back in the Quick Menu select Overrides > Save Content Directory Override
Example 2: Integer scaling, crt-geom shader
Example 3: Non-integer scaling, bilinear filter, Jeltron CRT overlay
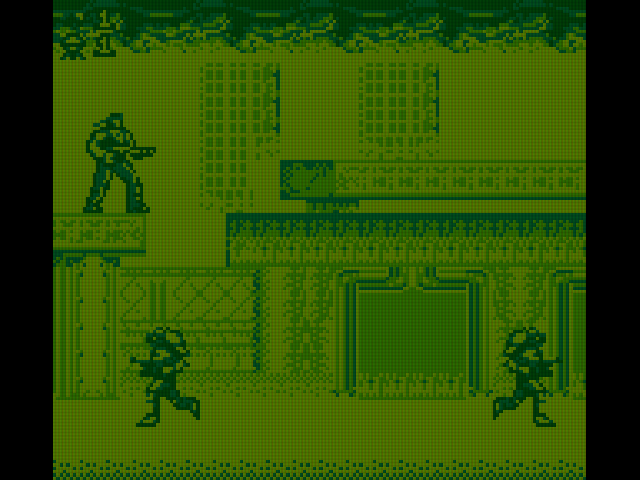
Nintendo Entertainment System (and PCE/TG-16)
As we start to get into home console systems, let’s focus on CRT shaders and crispy pixels. We’re going to stick with a standard 4:3 aspect ratio, although some prefer an 8:7 aspect for systems like NES, PC Engine/TurboGrafx-16, and SNES. I’m going to lump NES and TG-16 together, since most games have the same 256×240 resolution, so the effect will be identical. The first example is a clean integer scale, and the second example is also integer scaled with an added CRT geom shader for a curved look with scanlines that add depth. For the third example, I combined non-integer scaling with bilinear filter to create a balanced look on a larger display, and then added Jeltron’s CRT overlay (1.00 opacity) for a textured effect that masks some of the bilinear filter’s softness.
Example 1: Integer scaling, no shader applied
This one is easy. Just go to Settings > Video > Scaling and ensure that Integer Scaling is ON. Next, go to RetroArch Quick Menu > Overrides > Save Core Override
Example 2: Integer scaling, crt-geom shader
Go to Settings > Video > Scaling and turn Integer Scaling ON, then go to Quick Menu > Shaders > Load Preset > GLSL/SLANG > CRT > crt-geom and apply it. Now, go to Shaders > Save Preset and select Save Core Preset, then Quick Menu > Overrides > Save Core Override to make sure that integer scaling remains ON.
Example 3: Non-integer scaling, bilinear filter, Jeltron CRT overlay
This example requires an overlay available from Jeltron’s repository. That same repo has instructions and the overlay pack also contains a readme file. Follow those instructions to configure the on-screen overlay (1.00 opacity). Next, go to Settings > Video > Scaling and ensure that Integer Scaling is OFF; also within the scaling settings, turn Bilinear Filter ON. Next, go to RetroArch Quick Menu > Overrides > Save Core Override
Example 2: Integer scaling, blur>kawaze glow shader, Jeltron CRT overlay
Example 3: Integer scaling, crt consumer shader
Super Nintendo (SNES)
It’s hard to pinpoint a “perfect” SNES screen effect, because the system looks great under a variety of circumstances. The first example uses a simple sharp shimmerless shader to provide a clean, chunky effect that takes up the whole screen. The second example has naturally balanced pixels due to integer scaling, and uses Jeltron’s CRT overlay and a glow shader to create a bloom effect. Unfortunately there aren’t many bloom-style GLSL shaders at our disposal, and the kawaze shader’s effect is a little intense. Finally, the third example uses integer scaling and the CRT consumer shader for a rounded effect with balanced pixels.
Example 1: Non-integer scaling, sharp shimmerless shader
Install the sharp-shimmerless shader on your device as explained in the above section, then go to Quick Menu > Shaders > Load Preset and find your sharp-shimmerless shader. To save your results, go to Quick Menu > Overrides > Save Content Directory Override
Example 2: Integer scaling, blur>kawaze glow shader, Jeltron CRT overlay
This example requires an overlay available from Jeltron’s repository. That same repo has instructions and the overlay pack also contains a readme file. Follow those instructions to configure the on-screen overlay (1.00 opacity). Next, go to Settings > Video > Scaling and turn Integer Scaling ON, then go to Quick Menu > Shaders > Load Preset > GLSL/SLANG > Blur > kawaze glow and apply it. Once you are satisfied with the results, go to Shaders > Save Preset > Save Core Preset, then Quick Menu > Overrides > Save Core Override
Example 3: Integer scaling, crt consumer shader
Go to Settings > Video > Scaling and turn Integer Scaling ON, then go to Quick Menu > Shaders > Load Preset > GLSL/SLANG > CRT > crt-consumer and apply it. Once you are satisfied with the results, go to Shaders > Save Preset > Save Core Preset, then Quick Menu > Overrides > Save Core Override
Example 2: no shader applied, Jeltron CRT scanline overlay
Example 3: blur>kawaze glow shader, Jeltron CRT scanline overlay
Sega Genesis (and Sega CD)
Sega Genesis and Sega CD generally have natural integer scaling with small black bars at the top and bottom of the screen (although this is presented differently across emulators). In the first example, we have (natural) integer scaling and no shader, creating a clean look without any effects. The second example applies a simple CRT scanline overlay, and the third example adds a kawaze glow shader to make a softer, retro visual effect. Note that Jeltron’s scanline overlay produces a bit of a browner tint to darker shadows.
Example 1: no shader applied
Go to Settings > Video > Scaling and ensure that Integer Scaling is OFF. Depending on the core settings (Picodrive vs Genesis Plus GX) you may need to adjust the scaling and aspect ratio to match your expectations. I generally just force it to 4:3 since I can’t tell the difference between having the black bars on the top and bottom and removing them. Next, go to RetroArch Quick Menu > Overrides > Save Core Override
Example 2: no shader applied, Jeltron CRT scanline overlay
Go to Settings > Video > Scaling and ensure that Integer Scaling is OFF. Depending on the core settings (Picodrive vs Genesis Plus GX) you may need to adjust the scaling and aspect ratio to match your expectations. I generally just force it to 4:3 since I can’t tell the difference between having the black bars on the top and bottom and removing them. This example requires an overlay available from Jeltron’s repository. That same repo has instructions and the overlay pack also contains a readme file. Follow those instructions to configure the on-screen overlay (1.00 opacity). Once you are satisfied with the results, go to Quick Menu > Overrides > Save Core Override
Example 3: blur>kawaze glow shader, Jeltron CRT scanline overlay
This example requires an overlay available from Jeltron’s repository. That same repo has instructions and the overlay pack also contains a readme file. Follow those instructions to configure the on-screen overlay (1.00 opacity). Next, go to Settings > Video > Scaling and turn Integer Scaling OFF, then go to Quick Menu > Shaders > Load Preset > GLSL/SLANG > Blur > kawaze glow and apply it. Once you are satisfied with the results, go to Shaders > Save Preset > Save Core Preset, then Quick Menu > Overrides > Save Core Override
Example 2: Jeltron CRT overlay, 240p resolution to improve performance
Example 3: zfast crt shader, 240p resolution to improve performance
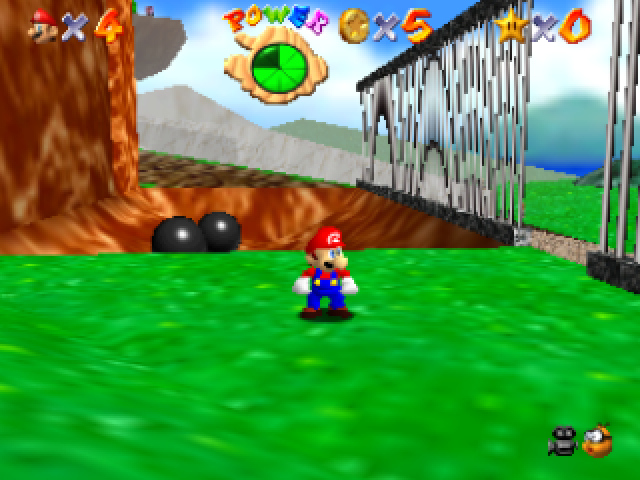
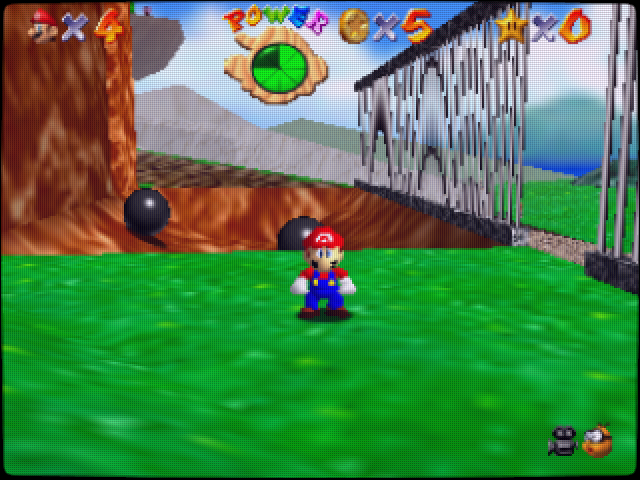
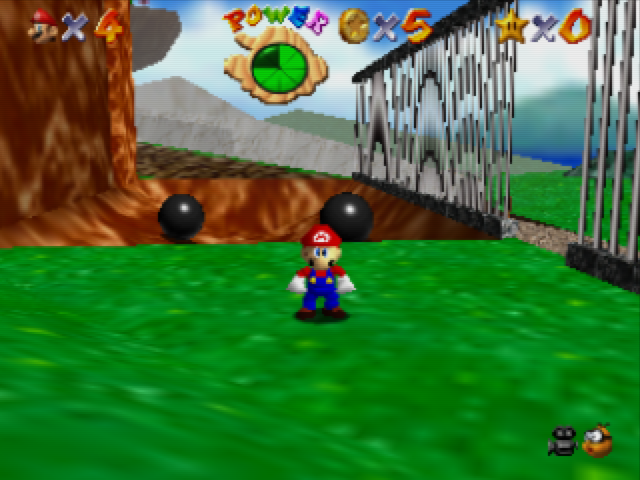
Nintendo 64 (and PS1, DC, and Saturn)
For more demanding 3D systems like PlayStation, Nintendo 64, Dreamcast, and Saturn, you may be limited in what screen effects you can use. Thankfully, these systems generally run at a native 240p or 480p resolution, so they will scale perfectly on the screen, and will naturally look good. But there are some lightweight effects you can apply to enhance your experience. In the first example we have no shader applied, for a clean/raw look. The second example applies Jeltron’s CRT overlay (1.00 opacity) to soften the hard edges, and the third example is a lightweight zfast crt shader which further enhances the effect with more depth.
Example 1: no shader applied, 240p resolution to improve performance
Start up a game, then enter the RetroArch Quick Menu > Core Options. You should see an option to adjust the resolution, on low-powered handhelds using 240p will improve performance (but make small text harder to read).
Example 2: Jeltron CRT overlay, 240p resolution to improve performance
Install the Jeltron overlays as explained in the above section, then go to RetroArch Quick Menu > On-Screen Overlay > Overlay Preset and select the Jeltron CRT overlay. Within the On-Screen Overlay section make sure that Overlay Opacity is set to 1.00 (or adjust it to your liking). Once you are happy with the results, navigate to Quick Menu > Overrides > Save Core Overrides.
Example 3: zfast crt shader, 240p resolution to improve performance
Start up a game, then go to RetroArch Quick Menu > Shaders > Load Preset > GLSL/SLANG > CRT > zfast-crt and enable the shader. Once you are happy with the look, go to Quick Menu > Shaders > Save Preset > Save Core Preset

Example 2: Non-integer scaling, crt-consumer shader
Example 3: Integer scaling, crt-1tap bloom shader
Arcade games
Here are three examples that work well with (horizontally-oriented) arcade games. The first is a sharp-shimmerless shader to balance pixels while filling out the screen with non-integer scaling, which retains a more modern pixel look. The second is a crt-consumer shader, which is a slightly heavyweight shader providing a curved look that resembles older arcade cabinets. Finally, the third option is a non-curved crt-1tap bloom (SLANG) shader, which provides a nice depth of field and bloom effect.
Example 1: Non-integer scaling, sharp shimmerless shader
Install the sharp-shimmerless shader as explained in the above section, go to Settings > Video > Scaling and turn Integer Scaling OFF, then go to Quick Menu > Shaders > Load Preset and find your sharp-shimmerless shader. Now, go to Shaders > Save Preset and select “Save Content Directory Preset” so that all games within your arcade folder will use this effect, without affecting other arcade games that may use that same core. Finally, go to Quick Menu > Overrides > Save Content Directory Overrides to make sure that integer scaling remains OFF.
Example 2: Non-integer scaling, crt-consumer shader
Go to Settings > Video > Scaling and turn Integer Scaling OFF, then go to Quick Menu > Shaders > Load Preset > GLSL/SLANG > CRT > crt-consumer and apply it. Now, go to Shaders > Save Preset and select “Save Content Directory Preset” so that all games within your arcade folder will use this effect, without affecting other arcade games that may use that same core. Finally, go to Quick Menu > Overrides > Save Content Directory Overrides to make sure that integer scaling remains OFF. Note that with some panels, this crt-consumer shader may work best with integer scaling ON.
Example 3: Integer scaling, crt-1tap bloom shader
Go to Settings > Video > Scaling and turn Integer Scaling ON, then go to Quick Menu > Shaders > Load Preset > GLSL/SLANG > CRT > crt-1tap bloom and apply it. Now, go to Shaders > Save Preset and select “Save Content Directory Preset” so that all games within your arcade folder will use this effect, without affecting other arcade games that may use that same core. Finally, go to Quick Menu > Overrides > Save Content Directory Overrides to make sure that integer scaling remains ON.
Note that for Neo Geo games, they had a slightly wider aspect ratio, which gives us space to use a small border overlay to enhance the experience. I recommend the overlay you can find from Jeltron’s pack (instructions provided on his website).
Special considerations for OnionOS (Miyoo Mini/Plus)
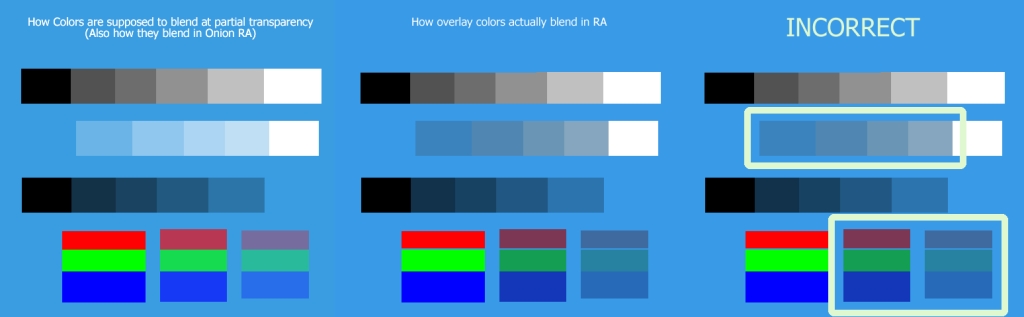
The team behind OnionOS have done some wizardry with their software that warrants special attention, because setting up screen effects on the Miyoo Mini and Miyoo Mini Plus are a little bit different that what we’ve established in the guide so far. Despite being a much more limited platform due to firmware constraints, the team has actually made the setup process easier and more accurate than using stock RetroArch. In fact, OnionOS fixes a bug in mainline RetroArch that makes overlays look worse at partial transparency — so your overlay options will often look better and less washed out on a Miyoo Mini Plus compared to other devices. This bug fix was created by akouzoukos (the creator of Apotris!), which makes it even cooler.
The OnionOS team also implemented special Gambatte palettes in their RetroArch build, which color-match special overlays (made by Jeltron) that are also pre-installed on the system. Long story short, OnionOS gives you the flexibility to install some robust screen effects without having to manually install anything.
- To properly configure each recommended overlay setup on OnionOS, I recommend reading through Jeltron’s guide on GitHub. The shaders, filters, and overlays described in his guide are already installed on recent versions of OnionOS (v4.2 and beyond), so it’s just a matter of following the instructions on your device to get them up and running.
- The Jeltron GBC and NGPC filters reshade the pixels and apply a pixel grid, further enhancing the illusion of playing on an original handheld. They work great with GBC’s multiple color correction options, letting you dial in your preferred look and feel.
- The GB overlay, when combined with the proper palette, replicates a shadow being cast onto the screen lens, and the reflective nature of the screen itself. It’s especially apparent when playing games with a scrolling effect.
- OnionOS also supports bilinear and bicubic scaling, which gives you additional options when using non-integer scaling on systems like GBA. Alternating these two scaling options gives with textured overlays can produce some unique effects.
- The Onion CRT overlay options include many that aren’t featured elsewhere (due to the aforementioned RetroArch bug), including matrix and checkerboard patterns, which are definitely worth checking out on these devices.


Note that these tips do not apply to the V4 Miyoo Mini (with its higher resolution screen), just the Miyoo Mini Plus and the older (V3 and below) Miyoo Mini models. Jeltron has a separate pack for the V4 on his GitHub repo.
Other OS considerations
- For the stock operating system on Anbernic RG*XX devices, they will have overlays and shaders pre-applied. The stock firmware is constantly being updated (more info in my RG*XX starter guide), but for most versions it is easy to configure. Go to App Center > Apps > Bezels, by default it should be set to AUTO, which will make overlays appear on all systems. If you set it to OFF, the shaders settings will still apply, but games will be non-integer scaled without any overlays. At that point you can adjust the overlay settings however you would like and save them as a game/core/content directory.
- Note that when plugging in your RG*XX device into an external screen via HDMI, it’s better to have the bezels set to AUTO because then the games will scale properly on a 16:9 display. If your bezels are set to OFF, the game image will stretch to fullscreen and look squished.
- For MinUI, most supported devices (including RG*XX devices, Miyoo Mini/Plus, Miyoo A30, TrimUI Smart Pro, and PowKiddy RGB30) have the option to add a light grid or scanline shader to the image. To do so, start up a game then press the Menu button > Options > Frontend and under Screen effect, select either Grid or Line. I prefer Grid for handheld (LCD) systems and Line for home console (CRT) systems. Note that these effects will darken the screen; to adjust the brightness, press Menu plus Vol+/- to reach your desired brightness level
- MinUI also has integer/non-integer scaling options. This is also found in Menu > Options > Frontend, under Screen Scaling. “Native” is integer scaling, “Aspect” is non-integer scaling with the core-provided aspect ratio, and “Fullscreen” will stretch the image to full screen. You can use the screen effect (Line/Grid) settings regardless of scaling option.
- Once you are happy with the results, go to Menu > Save Changes > Save for console (you can also choose “Save for game” for a per-game setting).
- KNULLI (and Batocera) has a habit of overriding your RetroArch settings with their own, which are configured in EmulationStation. They have a unique implementation of shaders (you can read more about it here), but I prefer to adjust the shaders directly in RetroArch, like with the other OS options found in this guide. If you are setting up your system in RetroArch but finding that the settings are not sticking when you close and open another game, go into the KUNLLI Main Menu > Game Settings and see if there are any settings that are turned on that are disrupting your RA overrides.
- For example, if your shader presets are not saving and being overwritten by KNULLI’s default setting for that particular system, go into the system menu within KNULLI (i.e. the SNES games list, for example), then press SELECT and choose Advance System Options > Game Rendering and Shaders > Shader Set > NONE. That will remove any preconfigured shaders and allow you to save your own preset within RetroArch itself.
- The same trick can be done with integer scaling and bilinear filtering; in fact for those two options I usually just set them in the KNULLI menu instead of within RetroArch just to make sure they don’t have any conflicts. It’s an extra step but easy once you get the hang of it.
- Adding shaders to KNULLI. If you try and place shaders in a folder within the regular file system (known as userdata in KNULLI), there is a bug in RetroArch where it won’t see the shader files. Instead, you must navigate to a certain folder FIRST, then navigate to where you saved the shader folder. It sounds complicated, but it’s actually pretty easy, I’ll walk you through an example.
- For this example, let’s assume you saved the RGC shaders folder directly into the KNULLI ROMs folder for quick and easy access.
- Open up a game in RetroArch, then press Menu + B to open up the RetroArch Quick Menu. Navigate to Shaders > Load Preset
- Now, hover over the “Parent Directory” option at the top of the file system, and press A four times until you navigate to the root (“/”) directory. You’ll see it listed with a bunch of Linuxy folders like “bin, boot, dev, etc”. Navigate down to userdata > roms and then find the location of your RGC shaders folder. You should now see the appropriate shader files inside there, and you can load them and save the shader preset.
- If you aren’t able to manually load the shaders, bear in mind that nearly all of the shaders in my RGC shaders pack are already loaded on KNULLI. The one exception is the sharp-shimmerless shader; in that case, I would recommend using the pixel-aa shader as your interpolation shader as it works just as well (and is already loaded in KNULLI). Here are the locations of each shader within KNULLI’s RetroArch folder:
- /crt/crt-1tap.glsp (subtle CRT effect)
- /crt/zfast_crt_geo_svideo.glsp (dramatic CRT effect)
- /pixel-art-scaling/pixel_aa.glsp (sharp interpolation that eliminates shimmering)
- More info about KNULLI and shaders can be found on their comprehensive wiki page.
My preferred setup for each system
In this section I am going to show my favorite configurations for each of the major systems. These are all collected in this RGC Overlays Pack, which you can install and load on the handheld of your choice. Note that none of these shaders and overlays were created by me, they are simply collected from the following resources for the purposes of streamlining this section. These reference packs have many more options if you want to dig further, which I encourage you to do!
These recommendations are made with low-powered handhelds in mind. If you have a 480p 4:3 device with more power (like a Retroid Pocket 2S or Anbernic RG405M), you have the ability to use high-end shaders like CRT-Consumer for greater effect. In the cases below, we’re going to try to enhance the game image without affecting performance.
Instructions: download the RGC Overlays Pack which contains three folders: overlays, shaders, and palettes. Place the overlays and shaders subfolders in the respective folder of your OS, as detailed in the shaders and overlays sections above. For example, with muOS you would place the shaders in SD1/MUOS/retroarch/shaders, and the overlays will go in SD1/MUOS/retroarch/overlays. The location is not super important, and if you cannot access the shaders/overlays folders on your own, no worries! Just make a new folder for each somewhere on the same card where your ROMs are stored, and then navigate to that location within RetroArch when loading up the shader or overlay. The palettes folder should be moved to the BIOS folder of your OS, so that it looks like BIOS/palettes/default.pal.
Let’s start with the handheld systems. For these, we have two options depending on the size of your screen and your preference towards perfect pixels. I would recommend integer scaling on 3.5″ or 4″ displays, and non-integer scaling on smaller (2.8″) displays — but try out both and see which one you like the most.
Game Boy (integer scaling): Jeltron overlay with PixelShift 03 or Special 1 colorization
For integer-scaled Game Boy, the Jeltron overlays provide a nice dark border and various screen effects to mimic the original handheld screen. Jeltron recommends the PixelShift 03 colorization option on the left, but you can experiement with other options to see what you like best (like Special 1, in the image on the right).
After installing the RGC overlay pack into the appropriate folders as explained above, start up a GB game. Press whatever key combo brings up your RetroArch Quick Menu (usually Menu + X). Press the B button to get to the Main Menu, then choose Video > Scaling and set the values as follows:
Integer Scaling: ON
Aspect Ratio: Custom
Integer Scaling: OFF (to reset scaling)
Custom Aspect Ratio (X Position): 80
Custom Aspect Ratio (Y Position): 12
Custom Aspect Ratio (Width): 480 (3x)
Custom Aspect Ratio (Height): 432 (3x)
Bilinear Filtering: OFF
Next, press B a couple times to return to the Main Menu, then select Quick Menu > Shaders > Video Shaders OFF. Then, go back to Quick Menu > On-Screen Overlay and set the following:
Overlay Preset: Jeltron_GB-DMG.cfg (in RGC overlays folder)
Overlay Opacity: 1.00
Press B to return to the Quick Menu, then go to Core Options and set the following :
GB Colorization: Internal
Internal Palette: PixelShift - Pack 1
PixelShift Pack 1 Palette: PixelShift 03 - BGB 0.3 Emulator
Interframe Blending: Simple

or

GB Colorization: Internal
Internal Palette: Special 1
Interframe Blending: Simple
To check the results, go to Quick Menu > Resume Game. If you are satisfied, go back to the Quick Menu and select Overrides > Save Content Directory Override
Game Boy (non-integer scaling): Perfect overlay with custom palette or Special 1 colorization w/ 60% overlay opacity
For non-integer scaled Game Boy, the “Perfect” overlay provide a nice shadow effect at the edges and can use their custom palette. I have also found that using other colorization effects (especially Special 1) can really make some of the textures pop as well. With some colorization choices, like Internal-DMG, it might be best to reduce the overlay opacity to as little as 0.60 to provide more balanced contrast. Also bear in mind that this is a relatively BRIGHT shader, so reducing your screen’s brightness can help balance things out.
After installing the RGC overlay pack into the appropriate folders as explained above, start up a GB game. Press whatever key combo brings up your RetroArch Quick Menu (usually Menu + X). Press the B button to get to the Main Menu, then choose Video > Scaling and set the values as follows:
Integer Scaling: OFF
Integer Scale Overscale: OFF
Aspect Ratio: Core Provided
Bilinear Filtering: OFF
Next, press B a couple times to return to the Main Menu, then select Quick Menu > Shaders > Video Shaders > ON, then navigate to Load Preset and navigate to where you saved the shimmerless shader when installing the RGC overlay pack, and choose sharp-shimmerless.glsp. While still in the Shaders menu, select Save Preset > Save Content Directory Preset.
Then, go back to Quick Menu > On-Screen Overlay and set the following:
Overlay Preset: Perfect_GB-DMG.cfg (in RGC overlays folder)
Overlay Opacity: 1.00 (or adjust to taste)
Press B to return to the Quick Menu, then go to Core Options and set the following :
GB Colorization: Custom (for custom palette)
Interframe Blending: Simple

or

GB Colorization: Internal
Internal Palette: Special 1
Interframe Blending: Simple
To check the results, go to Quick Menu > Resume Game. If you are satisfied, go back to the Quick Menu and select Overrides > Save Content Directory Override

Game Boy Color (integer scaling): Jeltron overlay with accurate or fast color correction
Jeltron’s integer-scaled GBC overlays are great, and really capture the essence of playing on a Game Boy Color. The big question is whether you prefer the more accurate colors on the left, or more saturated colors like on the right.
After installing the RGC overlay pack into the appropriate folders as explained above, start up a GBC game. Press whatever key combo brings up your RetroArch Quick Menu (usually Menu + X). Press the B button to get to the Main Menu, then choose Video > Scaling > Integer Scaling > OFF. Next, choose Aspect Ratio > Custom and set the values as follows:
Integer Scaling: ON
Aspect Ratio: Custom
Integer Scaling: OFF (to reset scaling)
Custom Aspect Ratio (X Position): 80
Custom Aspect Ratio (Y Position): 12
Custom Aspect Ratio (Width): 480 (3x)
Custom Aspect Ratio (Height): 432 (3x)
Bilinear Filtering: OFF
Next, press B a couple times to return to the Main Menu, then select Quick Menu > Shaders > Video Shaders OFF. Then, go back to Quick Menu > On-Screen Overlay and set the following:
Overlay Preset: Jeltron_GB-Color.cfg (in RGC overlays folder)
Overlay Opacity: 1.00
Press B to return to the Quick Menu, then go to Core Options and set the following :
Color Correction: GBC Only
Color Correction Mode: Accurate (desaturated) or Fast (saturated)
Interframe Blending: Simple
To check the results, go to Quick Menu > Resume Game. If you are satisfied, go back to the Quick Menu and select Overrides > Save Content Directory Override
Game Boy Color (non-integer scaling): Perfect overlay with 1.00 or 0.80 overlay opacity
If you prefer non-integer scaled GBC for the largest screen possible, then the “Perfect” overlays are an excellent match. They provide a grid and shadow effect, but can be quite dark at 1.00 opacity. I recommend experimenting with lower opacity levels to find what you like best.
After installing the RGC overlay pack into the appropriate folders as explained above, start up a GBC game. Press whatever key combo brings up your RetroArch Quick Menu (usually Menu + X). Press the B button to get to the Main Menu, then choose Video > Scaling and set the values as follows:
Integer Scaling: OFF
Integer Scale Overscale: OFF
Aspect Ratio: Core Provided
Bilinear Filtering: OFF
Next, press B a couple times to return to the Main Menu, then select Quick Menu > Shaders > Video Shaders > ON, then navigate to Load Preset and navigate to where you saved the shimmerless shader when installing the RGC pack, and choose sharp-shimmerless.glsp. While still in the Shaders menu, select Save Preset > Save Content Directory Preset.
Then, go back to Quick Menu > On-Screen Overlay and set the following:
Overlay Preset: Perfect_GB-Color.cfg (in RGC overlays folder)
Overlay Opacity: 1.00 or 0.80 (or whatever you like best!)
Press B to return to the Quick Menu, then go to Core Options and set the following :
Color Correction: GBC Only
Color Correction Mode: Accurate (desaturated) or Fast (saturated)
Interframe Blending: Simple
To check the results, go to Quick Menu > Resume Game. If you are satisfied, go back to the Quick Menu and select Overrides > Save Content Directory Override
Game Boy Advance (non-integer scaling): Perfect (75%) overlay with shimmerless shader
As discussed previously, GBA with integer scaling is too small on a 480p display. So instead we’re going to use non-integer scaling and the sharp shimmerless shader to balance the image as much as possible. From there, we are going to apply the “Perfect” 75% overlay (I really like its colorful GBA logo on the bottom; the Jeltron GBA overlay is more subdued if you prefer that look). Finally, you can choose to use color correction and interframe blending to further enhance the experience.
After installing the RGC overlay pack into the appropriate folders as explained above, start up a GBA game. Press whatever key combo brings up your RetroArch Quick Menu (usually Menu + X). Press the B button to get to the Main Menu, then choose Video > Scaling and set the values as follows:
Integer Scaling: ON
Aspect Ratio: Custom
Integer Scaling: OFF (to reset scaling)
Custom Aspect Ratio (X Position): 0
Custom Aspect Ratio (Y Position): 0
Custom Aspect Ratio (Width): 640
Custom Aspect Ratio (Height): 427
Bilinear Filtering: OFF
Next, press B a couple times to return to the Main Menu, then select Quick Menu > Shaders > Video Shaders > ON, then navigate to Load Preset and navigate to where you saved the shimmerless shader when installing the RGC pack, and choose sharp-shimmerless.glsp. While still in the Shaders menu, select Save Preset > Save Core Preset.
Then, go back to Quick Menu > On-Screen Overlay and set the following:
Overlay Preset: Perfect_GBA.cfg (in RGC overlays folder)
Overlay Opacity: 1.00 (or whatever you like best!)
Press B to return to the Quick Menu, then go to Core Options and set the following :
Color Correction: OFF or ON (based on preference)
Interframe Blending: ON (to reduce flickering)
To check the results, go to Quick Menu > Resume Game. If you are satisfied, go back to the Quick Menu and select Overrides > Save Core Override

Right images: shimmerless shader (no overlay)
Pixel-era home console (non-integer scaling): sharp shimmerless shader with or without CRT overlay
This section applies to the many home console systems in the pixel/retro era: NES, SNES, Genesis, TG-16, and so on. It can also be applied to MAME/FBNeo (horizontal) arcade games as well. For this group of systems, I think it’s most important to balance pixels while giving the game as large an image as possible. For this reason we’re going to use a sharp-shimmerless shader to balance the pixels for non-integer-scaled systems, and then an optional CRT overlay to provide more texture and a little depth. Also see below for a more dramatic CRT effect.
After installing the RGC overlay pack into the appropriate folders as explained above, start up a game. Press whatever key combo brings up your RetroArch Quick Menu (usually Menu + X). Press the B button to get to the Main Menu, then choose Video > Scaling and set the values as follows:
Integer Scaling: OFF
Aspect Ratio: Full
Bilinear Filtering: OFF
Next, press B a couple times to return to the Main Menu, then select Quick Menu > Shaders > Video Shaders > ON, then navigate to Load Preset and navigate to where you saved the shimmerless shader when installing the RGC pack, and choose sharp-shimmerless.glsp. While still in the Shaders menu, select Save Preset > Save Core Preset.
If you would like to apply a CRT overlay, go back to Quick Menu > On-Screen Overlay and set the following:
Overlay Preset: Jeltron_CRT.cfg (in RGC overlays folder)
Overlay Opacity: 1.00
To check the results, go to Quick Menu > Resume Game. If you are satisfied, go back to the Quick Menu and select Overrides > Save Core Override
If you are looking for a dramatic CRT shader that is lightweight, I would recommend the CRT > zfast_crt_geo_svideo shader. It is not available on some custom firmwares but can be found on the RetroArch GLSL shader repository, and is also included in the RGC Overlays Pack. Note that this shaders requires integer scaling for a balanced picture. If you’d like to go even further, you can layer another shader under the CRT shader to provide a more pronounced blooming effect, like in the images above. Note that some of the colors will be slightly modified by this shader (you can see it’s most prominent in the Super Mario Bros. 2 image — everything has a light blueish tone to it).
Shaders > Load Preset > Blur > kawase_glow
Shaders > Append Preset > crt > zfast_crt_geo_svideo
Shaders > Shader Parameters > Scanline Amount: 12.00
Shaders > Shader Parameters > Mask Amount: 0.40
Shaders > Shader Parameters > Convergence X-Axis: 0.50 (set to 0 for sharper image)
Shaders > Shader Parameters > Convergence X-Axis: -0.20 (set to 0 for sharper image)
Also make sure that you have any On-Screen Overlays turned OFF since they can conflict with this setup. If you are happy with these results, you can go back into the Shaders menu, then select Save Preset > Save Core Preset. Then go back to the Quick Menu and select Overrides > Save Core Override.

Right images: shimmerless shader + CRT overlay
3D-era home consoles (integer scaling): Jeltron CRT overlay with bilinear filtering or shimmerless shader
This applies to systems like PS1, N64, Saturn, and Dreamcast. For this era of games, we are dealing with a higher pixel density, and also somewhat jagged 3D polygons. Applying a bilinear filter will smooth out those polygons and thanks to the higher pixel count, it will give the image depth without the blurriness that comes from using this filter on pixel-based systems. If the image is too blurry for your liking, you can turn bilinear filtering off and use the shimmerless shader to slightly soften the image instead. Also see below for a more dramatic CRT effect.
Note that depending on your device, it may be running a non-RetroArch emulator in order to improve performance (like the standalone N64 emulator used in muOS and other custom firmwares). If that is the case with your handheld, there is not much you can do in terms of enhancing the image.
After installing the RGC overlay pack into the appropriate folders as explained above, start up a game. Press whatever key combo brings up your RetroArch Quick Menu (usually Menu + X). Press the B button to get to the Main Menu, then choose Video > Scaling and set the values as follows:
Integer Scaling: OFF
Aspect Ratio: Core provided
Bilinear Filtering: ON
Next, press B a couple times to return to the Main Menu, then select Quick Menu > Shaders > Video Shaders OFF. Then, go back to Quick Menu > On-Screen Overlay and set the following:
Overlay Preset: Jeltron_CRT.cfg (in RGC overlays folder)
Overlay Opacity: 1.00
To check the results, go to Quick Menu > Resume Game. If the image looks too blurry for your game, then we can remove the Interframe Blending and apply a shimmerless shader instead. Go back to Main Menu > Video > Scaling > Bilinear Filtering > OFF, then return to the Main Menu. Select Quick Menu > Shaders > Video Shaders > ON, then navigate to Load Preset and navigate to where you saved the shimmerless shader when installing the RGC overlay pack, and choose sharp-shimmerless.glsp. While still in the Shaders menu, select Save Preset > Save Core Preset.
Once you are satisfied with your setup, go back to the Quick Menu and select Overrides > Save Core Override.
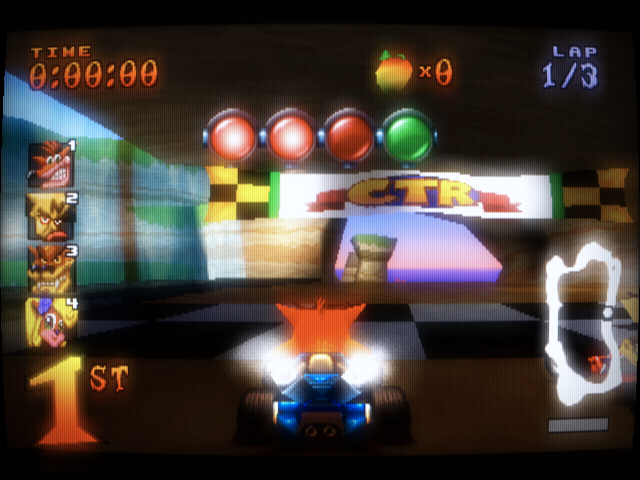
If you are looking for a dramatic CRT shader that is lightweight, I would recommend the CRT > zfast_crt_geo_svideo shader. It is not available on some custom firmwares but can be found on the RetroArch GLSL shader repository, and is also included in the RGC Overlays Pack. Note that this shaders requires integer scaling for a balanced picture, which is perfect for these 3D systems since they already are integer scaled on a 480p display. If you’d like to go even further, you can layer another shader under the CRT shader to provide a more pronounced blooming effect, like in the images above.
Here are my recommended settings:
Shaders > Load Preset > Blur > kawase_glow
Shaders > Append Preset > crt > zfast_crt_geo_svideo
Shaders > Shader Parameters > Scanline Amount: 12.00
Shaders > Shader Parameters > Mask Amount: 0.40
Shaders > Shader Parameters > Convergence X-Axis: 0.50 (set to 0 for sharper image)
Shaders > Shader Parameters > Convergence X-Axis: -0.20 (set to 0 for sharper image)
Also make sure that you have any On-Screen Overlays turned OFF since they can conflict with this setup. If you are happy with these results, you can go back into the Shaders menu, then select Save Preset > Save Core Preset. Then go back to the Quick Menu and select Overrides > Save Core Override.
720 x 720 screen settings
While this guide is focused on standard 640×480 resolution (4:3) displays, another popular screen type is 720×720 (1:1). These screens are found in devices like the PowKiddy RGB30, ZPG A1 Unicorn, and Anbernic RG Cube handhelds. Here are my preferred settings for each of the popular emulated systems.
To start, download the 720×720 overlays pack available on Jeltron’s Retro Overlays repository, since we’ll be using several of them. Install them on your device like you did the RGC shaders and overlays pack noted above. Note that for many of the system-based Jeltron overlays, there are pixel offsets and dimensions specific to those consoles, so be sure to read through their readme file to configure everything properly.
In order to use the pixel_aa and pixel_aa_fast shaders, you may need to run the Main Menu > Online Updater > Update GLSL Shaders function within RetroArch. If the option is not there (like with the stock version of Anbernic’s H700 firmware), you will need to go into Settings > User Interface > Menu Item Visibility > Show Online Updater > ON.
With the pixel_aa shader, before saving it as a Core Preset, go into Shader Parameters > Enable subpixel AA > 1.00 to help balance and sharpen pixels even more. You can use other shaders (like sharp shimmerless), they will produce the same result, but the pixel_aa is my favorite for this screen because it makes everything look very crisp.
| System | Scaling | Shader | Overlay |
| GB | Non-integer, 10:9 | pixel_aa | Jeltron 3px grid (0.70 opacity) |
| GBC | Non-integer, 10:9 | pixel_aa | Jeltron 3px grid (0.70 opacity) |
| GBA | Integer w/ Jeltron offsets | none | Jeltron GBA_grid (0.70 opacity) |
| GG | Non-integer, 10:9 | pixel_aa | Jeltron 3px grid (0.80 opacity) |
| NGPC | Non-integer, core provided | pixel_aa | Jeltron 3px grid (0.80 opacity) |
| NES | Integer Overscale, 8:7 | none | Jeltron 3px scanlines (0.70 opacity) |
| SNES | Integer Overscale, 8:7 | none | Jeltron 3px scanlines (0.70 opacity) |
| TG-16 | Integer Overscale, 8:7 | none | Jeltron 3px scanlines (0.70 opacity) |
| Genesis | Non-integer w/ Jeltron offsets | pixel_aa | Jeltron GEN_576p_CRT |
| Neo Geo | Non-integer w/ Jeltron offsets | pixel_aa | Jeltron NeoGeo_576p_CRT |
| Arcade | Non-integer, core provided | pixel_aa | Jeltron 3px scanlines (0.70 opacity) |
| PS1 | Non-integer w/ Jeltron offsets | pixel_aa_fast | Jeltron Playstation_576p_CRT |
| N64 | Non-integer, core provided | pixel_aa_fast | Jeltron 3px scanlines (0.70 opacity) |
| DC | Non-integer w/ Jeltron offsets | pixel_aa_fast | Jeltron Dreamcast_576p_CRT |
For GB/GBC and NGPC in particular, Jeltron has some wonderful integer-scaled overlays for these screens, but I prefer to use non-integer scaling to blow the image up as large as possible, then use the pixel_aa shader to balance the pixels. Try out both methods to see which one you prefer!
Note that the Jeltron overlays will darken your screen, so you may need to increase the brightness to suit your needs. You can also try experimenting with the overlay opacity to find your preferred mix of overlay plus screen intensity; the opacity recommendations above are simply my favorites.
Changelog
17NOV2024:
– added Spruce (Miyoo A30) overlay location
18OCT2024:
– added 720×720 section
23SEP2024:
– added links to KNULLI’s updated shaders wiki page
02SEP2024:
– added a section about adding shaders to KNULLI specifically, which can be tricky. You can find it in the Other OS Considerations section.
01SEP2024:
– published guide
– added some recommended shaders thanks to community feedback

Great guide!
Please make the settings downloadable somehow – I trust your judgment and don’t want to fiddle around myself.
Also having blurred bottoms for those screenshots made comparing things a little challenging.
LikeLike
Fantastic and VERY comprehensive guide! Thanks so much for all your contributions to the community, Russ. I cannot imagine how much time you spend on all things retrogaming and helping out with your knowledge. Really appreciate it, thanks again!
Greetings from Germany (and have a good time in Berlin!)
Markus
LikeLike
Literally yesterday (just right before Russ’s vid came out) I stumble across shader config for Gameboy line of dot matrix LCD handhelds, done by u/mattalicious on reddit.
(Not sure if I can post direct link so here’s the clue: comments/1dknali/ at r/RetroArch).
This is the most stunning one I’ve tried and definitly worth testing/tweaking anywhere integer scaling makes sense. Currently supports Vulkan only.
LikeLike
This was more than worth the wait and the tremrndous amount of time you have out in this video/guide.
Thank you so much for it. I will refer to that article again and again. And then again…
LikeLike
This is a brilliant guide. Thanks for all your work putting this together. Its very comprehensive.
I can get most of it working but Knulli does not seem to like your shaders folder. I can add the folder to the Share folder so its stored with the rest of my roms and I can even navigate to it in Retroarch but when I open the folder it just says “no items”. I’ve tried adding it to a few other locations but I still can’t get retroarch to see the shader preset files. No such issues with the palettes or overlays though. They show up perfectly. I’ll keep plugging away at it but is this just a quirk of Knulli?
LikeLike
Same here… no files found in RA…
LikeLike
I got them to work on my RG35XXSP running KnulliOS with a dual MicroSD setup, but only the ones in the GLSL folder.
When selecting the shader you have to go all the way up the directories until you can select the folder “userdata”, in there is the “share” partition when accessing the device remotely. I just threw the folder into batocerashaders and there they show up just fine, though I’m assuming they should show up in any other folder as well.
LikeLike
Im having this same issue. No one has gotten me a solution yet.
LikeLike
Yeah same here I can’t seem to find the files on arkos the folder appears but with no files
LikeLike
Yeah same here on Arkos, the folder appears but with no files.
LikeLike
I don’t have an ArkOS device on me to test with, but if it’s not showing the shader then my guess is it is behaving much like KNULLI does, and it won’t recognize the shaders unless you navigate back to the root of their directory first and then navigate to the shader file location. I have similar instructions for KNULLI in my “Other OS Considerations” chapter of this guide, but the target location will be different in ArkOS. Sorry for the half-directions, I’m on travel and won’t have access to an ArkOS device for a couple weeks to give more specific details. Hopefully this is enough to figure it out!
LikeLike
Hi, sorry about that, it turns out that there is a bug in the KNULLI version of RetroArch where it won’t recognize your shaders until you navigate back to the userdata folder FIRST. I’ve added instructions in the “Other OS Options” section of this guide, hope it resolves the issue.
LikeLike
The overlay Jeltron_GB-DMG.png is the GB pocket version. Thank you!!!
LikeLike
If you’re referring to the “GB Pocket” text at the bottom of the overlay, that’s just how his overlays are — both his DMG and GBP overlays have the same text. The big difference is the grid shading, which is different for DMG.
LikeLike
Great guide, Russ! Thank you!
LikeLike
Are these available for GarlicOS (Original 35XX)?
LikeLike
Haven’t tried them for myself but this repo has them:
https://github.com/mugwomp93/GarlicOS_Customization?tab=readme-ov-file
LikeLike
here’s my working solution for getting the shaders/etc onto my ArkOS RG353M
Hope this helps someone. Spent a day or so searching for the solution and it doesn’t seem like there’s an easier way to access the internal file structure of ArkOS. Because of that, there is probably some risk inherent to accessing it via SFTP, I would back up the SD card if there’s something you care about in case you end up deleting the whole file structure or something silly.
LikeLike
idk how to edit posts, but there’s an implied step 4.5 which is to upload the files from your computer
LikeLike
I’m running Knulli on the RGXX40 V and having some troubles with the color correction.
For the GBC i can’t seem to find a way to save the color correction options, everytime i exit the game and start the game again where i have set up that i turns it OFF automatically.
For the GBA i can’t seem to find any color correction options inside the Core Options menu.
Any help would be appreciated, thanks!
LikeLike
For fellow PS Vita enthusiasts playing SNES in Retroarch: You can use the the following settings for an near-authentic experience…
Integer scaling: “Off”
Bilinear filtering: “Off”
overlay preset: “Jeltron_CRT”
overlay opacity: “1.00”
Landscape Overlay Scale: “1.00”
Landscape Overlay Aspect adjustment: “-0.320”
I had to reference Russ’ PS Vita-Retroarch guide, the guide above, and meticulously and incrementally test settings. Thanks for the great guides! Hope this helps!
LikeLike
hi
i use for 2d games (8 and 16 bit tv console systems) with original firmware
Integer scaling: “Off”
Aspect ratio: “custom”
Custom Aspect ratio (width): “640”
Custom Aspect ratio (height): “448”
Crop Overscan “off”
don’t forget to save setting for content directory with Override
A lot of games (perhaps all in 16bit) use 320 or 256 pixels in width and 224 pixel in height
It seems 240p in a CRT TV will only display 224p, vertical linearity/vertical S-correction needs adjusting, there’s no important information in those 16 extra lines
The height is de facto in integer scaling and the width respect the stretched screen like a TV experience without too much CPU processing for accuracy
shader used is Pixelate for 256 pixels height system (snes and nes and others)
Just try it
LikeLike
Everything ok with Arkos on Anbernic rg353m, thank you so much!
The only issue Is that in Retroarch, in the video scaling settings I cannot set the x and y position, there are no commands about It, why this???
LikeLike
Rocknix file set up on 353ps using 2 SD cards:
1. Put the RGC folders (unzipped) on to SD card #1. Just drop them in the main folder.
2. Boot console and open the File Manager from the tools section. (note that B is the select button and A is the cancel button inside the file manager)
3. Navigate to the root of the card and select the /flash folder
4. copy and paste the folders to the following paths:
/roms/BIOS/palettes
/storage/shaders/RGC Shaders
/storage/overlays/RGC Overlays
I am having a problem where if I set the Sharp Shimmerless shader within the Rocknix system settings (or per system config) then no game will boot from that system. The RGC shaders do show up within RetroArch in the normal shader directories so I’m pretty sure it’s just a bug I may have put the shaders in the wrong folder and if I figure it out or someone corrects me I’ll try to reply to this comment with the updated info. I think I managed a work around for this where I set the shader within RetroArch and made a Content Directory Override file for any of the consoles I wanted to use Sharp Shimmerless on.
LikeLike
hey! thanks for this guide. I think the latest version of minui no longer supports shaders; there’s no ‘screen effect’ options, at least on my miyoo mini+. anyone run into this/figured out a way around it?
LikeLike
Hey Russ. Great guide. This kind of stuff really isn’t intuitive, even for someone who knows RA inside and out like I do. As well, ROCKNIX at least doesn’t really come with overlays/bezels, and I doubt it’s a priority for the devs, so having an easy guide to add them is a boon.
First off, there’s a shader called pixel_AA (under pixel-art-scaling); it might be worth checking out. It’s another shimmerless shader when used with subpixel rendering settings, from what I understand, but more oriented toward arbitrary screen sizes than your suggested shader (which seems most oriented toward smaller screen sizes).
Related to this, I’d really enjoy an update for 16:9 screens, like my 720p X55 (bought on your recommendation!). It’d take a lot of work, I know, but those kinds of screens are very common, and it’d double up to help with a lot of Android devices as well. Hoping you’ll be able to add those resources sometime!
LikeLike
Hi Russ, any chance we could get a similar overlay/shader guide to cover 16:9 devices like the Odin 2 and upcoming Retroid 5? I’m having a real hard time finding nice looking bezels for all the main consoles – especially the handhelds like GB, GBC, GBA, etc. Would love to be able to wipe the experimenting I’ve done (likely very messy and broken in places!) and follow one of your guides instead to get my Odin 2 looking sweet and all set up perfectly with no big black bars!
One thing I did want to share with you in return is something I found researching the above. There’s a YouTube channel named “Fercho” that has created some super nice animated overlays for NES, SNES, Genesis and PlayStation – they look great, the buttons animate on screen when you press the physical ones, and you can even tap the screen to use buttons to reset/power off the consoles etc. Worth checking out and I’m hoping he returns with more at some point, but he hasn’t posted in a year 😦
LikeLike
I think one important shader type that has been left out of the guide are the dithering shaders. Sega Genesis especially, took advantage of how CRTs worked by using dithering to create transparency effects and smooth out color gradients.
LikeLike
Whenever I try to set the shimmerless shader for GBA I get a message saying “Failed to apply shader preset” in Retroarch. No idea why… I removed content directory overrides in case that was the problem but still get the same thing, even though the shader is there along with the rest of them 😦 (running Rocknix on RG353PS).
LikeLike
Hi !
I tried to use the 720×720 overlay with my RG Cube but I can’t seem to make it work… a I the only one ?
When I try the Jeltron 3px grid for the gb, it only take a small part of my screen…
When I try to use custom aspect ratio for psx, I have black screen…
I’m pretty familiar with RA tweakings but this one seems beyond me !!!
Can someone help me please ? 🙂
LikeLike
ImageMate PRO 128gb SanDisk V30 XC1 A2, and a 3 in the U from Walmart doesnt work in slot 2 in the R36S, it works when imaged for OS slot, but no matter what I formatted my other to for the SD slot 2 (exfat, ntfs, large fat, etc) it couldnt see it.
LikeLike
Hi Russ, for 720×720, do you have a different recommendation for vertical arcade? Your arcade settings works well for horizontal arcade games but not vertical ones. Too much shimmering.
LikeLike
Sadly, the latest RetroArch build seems to have removed (or moved) the ability to adjust the Custom Aspect Ratio X and Y positions. I have only the option to set Width and Height. Any ideas of where this could have been moved to, Russ?
LikeLike
Can confirm, fresh install of MuOS, and the X/Y position settings are missing.
LikeLike
Some help…Nes system, i make the like the video and save core preset and override /save core game Overrides but the effect remains active, but by going to the menu and playing other NEs or the same the save would be lost. how to fix this?
LikeLike
when I enable the Jeltron overlay on the steam deck my screen turns into a messy green and yellow dot-parade. Do these not work on the steam deck correctly?
LikeLike
No, the overlays are for designed devices with a display resolution of 640×480 (or 720×720).
The Steam Deck is 1280×800, so those overlays will not function properly for it.
LikeLike
I figured as much. Was just hoping they would be too small an/or not aligned properly and I would have to tinker with the settings. So I was surprised my whole screen turned greenish/yellow.
I just wanted to add like a shadow around the edges of the screen so simulate life as depth of the gb and gbc screen and maybe the gba, but I’m too stupid to figure out what settings to add in the shader presets, and I saw the overlays had them as well.
guess I’ll just have to play without it for now cause there aren’t really any good stea m deck overlays out there with the looks that I prefer
LikeLike
Hi,
Excellent guide. Appreciate the effort that has gone into it.
On the RG Cube XX the offsets are not right for me on 576p 4:3 settings. It states x: -24 & y: 60. I have found that x: needs to be set to 0 for the overlay to align correctly.
Using -24 shifted the screen over to the left cutting off the screen to the right and leaving a larger border.
cheers.
LikeLike
Thank you, my dear friend! I learned a lot of new and interesting things! And since you have such a detailed and regularly updated guide, I think you can supplement it and help many … Or a few, like me 🙂 For the second day I have been looking for information on how to automatically enable the overlay when connecting a pocket console (Anbernic RG353VS) to a TV. Previously, I had an RG35xx PLUS console and the KNULLI firmware is available for it, in which everything is easy and configured through EmulationStation. No problems! Everything is super! But now I have RG353VS and there is no KNULLI for it, so I use Rocknix. And here everything is much sadder: through EmulationStation I can enable the overlay, but it is simply superimposed, without parameters, without scaling, without automatic alignment under the overlay as in KNULLI, as a result of which I manually have to align through RetroArch, I saved the overrides and it would seem great .. But! When I disconnect the HDMI cable from the TV and launch the game directly from the console, I see the overlay! And I don’t need it! Please, supplement your guide with information on how to make the overlay appear only in widescreen mode (16:9), but not in 4:3.
LikeLike
Great guide as always, Russ!
Do you have plans to update the guide for 960×720 devices (RG406V, 406H, etc.)? I believe there are overlays for this resolution already.
Thanks!
LikeLike
is that
LikeLike
is that why it fails every time I try and load shaders on my rg406v? The resolution?
LikeLike
Can anyone else not unzip the 480p 6-1-23.zip on Jeltr0n’s github?
LikeLike
Hello everyone! I’m trying to apply these setting but I have a question. I’m using Stock Firmware and I disabled Bezels in the Apps section as requested (It was on AUTO). Shouldn’t I disable Shaders as well? (It’s on AUTO in the Apps section).
LikeLike
“Non-integer w/ Jeltron offsets”
I don’t quite understand what w represents here and what does Jeltron offsets mean?
LikeLike