
Last updated: 03AUG2024 (see Changelog for details)
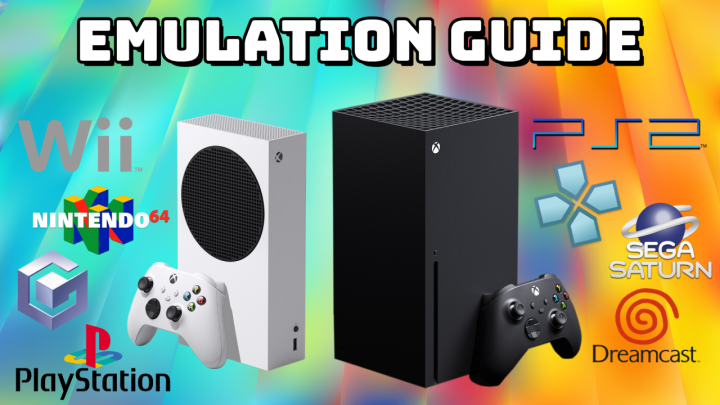
In my quest to find great emulation at a budget price, the idea of running games on the Xbox series devices recently came on my radar. Considering that the Xbox Series S retails for $300, I decided to pick one up and test its performance against a similarly-priced PC, and the results are fantastic.
In addition to running classic games up to PS2 with higher resolutions, you maintain all of the functionality of the retail Xbox, and the whole endeavor is completely legal and available through Xbox’s Dev Mode process (after a one-time $19 fee). It does take some configuration to get set up, and so this guide will help you through that process and get you well on your way for all the retro gaming your heart could desire. If you would like to see the full suite of apps and emulators you can use on your Xbox in Dev Mode, check out this Xbox Dev Store.
There are other ways of playing retro games on your Xbox (aka “Retail Mode”), but those run the risk of having your account suspended or banned, and most Retail Mode efforts have thankfully shut down. In this guide we will only be performing the approved Dev Mode method. There is no known risk of having your device bricked (or account suspended) by following this Dev Mode guide.
This guide would not be possible without the excellent work done by Ryan over at Archades Games, whose Xbox emulation tutorials are comprehensive and relevant. For further exploration of specific systems, I recommend checking out his channel, and consider contributing to his Patreon page. Additionally, the Xbox Emulation Hub discord is a super helpful resource in case you have any questions.
Note that this guide will work on Xbox One consoles too, but will require a different DevKit Activation app (more info in that section of the guide). All other parts of this guide apply. Performance will be worse than on the Xbox Series consoles; while I haven’t tested it myself, I have been told that the Xbox One is more than capable of playing Dreamcast and below. If you are curious about emulation compatibility, check out this community sheet.
If you’re on the fence about whether the Xbox Series S is worth the investment for game emulation, check out this video above, where I will walk you through the experience of buying, setting up, and gaming on this device from a retro gamer’s perspective.
Table of Contents
Set up developer mode
Enter developer mode
Set up an external drive
Set up Remote Access
Safe Exit (return to Retail Mode)
Download and install RetroArch
Set up RetroArch
Adding BIOS and game files
Create games playlists
Recommended RetroArch cores
Recommended RetroArch configurations
Updating RetroArch
Nintendo GameCube and Wii
Sony PlayStation Portable
Sony PlayStation 2
Xbox 360

Changelog
Set up developer mode
- I recommend using Microsoft Edge for the best compatibility. Head over to the Microsoft developer registration page. Here, you can read up on the program and then click on the “Sign Up” button near the top of the screen. Make sure you are signed into your Microsoft profile (the same account you use for Xbox), and fill out the registration details and pay the $19 one-time fee for an individual account. Note that a credit or debit card is required to pay the fee. Once complete, you will be taken to the developer dashboard (if you are not redirected, here is a direct link).
- Now that you are registered on your PC, head to the activation URL and it will take you to a “Manage Xbox consoles” section. In the top-right corner, click on the “+” icon and it will prompt you to enter an activation code. Let’s head over to the Xbox and get that set up.
- On the Microsoft Store within your Xbox, search for the app “Xbox Dev Mode”. It will have a green icon that says “Devkit Activation”. Download and install this free app. Note: if using an Xbox One console, it will be a different app; just grab the app that has an icon that matches your device!
- Open the Devkit Activation app, and it will greet you with a welcome page. Go through the prompts until it asks you to activate your account via a six-digit alphanumeric code. Enter this code into your PC on the activation page and select “Submit”. If you’d like, you can add a device name for your Xbox at this time.
Enter developer mode
- Back on the Xbox, you will be prompted to switch to developer mode by restarting your device. Let’s go ahead and do that. As a heads up, any time you want to boot into developer mode you will want to open the Xbox Dev Mode app and reboot from the main Xbox interface. The first time you boot into Dev Mode it may take a while.
- Depending on your TV/monitor setup, a pop-up may ask you to enable advanced video features — go ahead and enable that. Note that you will also need to be connected to your home network for the rest of this tutorial, so if you are not already connected (I recommend an ethernet connection if possible), then go into Settings and set up your network connection. You can find it by navigating to Settings > General > Network Settings.
- On the main Dev Mode dashboard, you will see a box on the right called “Test Accounts”. here, click. on “Add Existing”, and add your Microsoft account credentials. Once complete, you will see your account name listed on-screen. If you’d like you can make the “Test Accounts” box invisible by hovering over the box, pressing the back (SELECT) button on your controller, and choosing “Remove Tool”.
When adding a test account in the step above, you will not be able to log in if you have two-factor authentication (2FA) enabled on your Microsoft account. To temporarily turn it off, go to live.com on your PC, then log in and go to Security > Additional Security > Two-Step Verification and turn it “Off”. Now log into your account on the Xbox, and you can then turn 2FA back on.
Set up an external drive
Previously, you had to expand the Xbox’s internal storage to make space for retro games, but thankfully all of your games and emulator data can now be stored on external USB storage with minimal fuss. For this I would recommend a USB flash drive or USB SSD. These are the products I recommend.
USB flash drives:
Samsung BAR Plus (256GB) -- around $24
Samsung Fit (256GB) -- around $25
SanDisk Ultra (512GB) -- around $35
PNY Turbo Attaché (512GB) -- around $35

USB Solid State Drives:
Samsung T7 (500GB) -- around $65
Samsung T7 (1TB) -- around $90
Samsung T7 Shield (1TB) -- around $99
Once you have an external drive, we need to format it to NTFS and set up special security permissions. For this step you will need a Windows PC.
- Head over to this page and download the latest version of XboxMediaUSB in 7z or zip format. If you are using a modern PC, you will likely want to the x86 version. This app also requires .NET Framework 4.8.1, if you run into any issues with the app, you can find a link to download it on the XboxMediaUSB page.
- Once downloaded, extract the XboxMediaUSB file using 7zip or a similar tool. Insert your external drive into your PC, the start up the XboxMediaUSB tool. On the left, you will see a “Prepare new USB drive”, and a drop-down to choose your USB drive. Make sure you have selected the correct drive, since the next step will format that drive.
- Once you have selected your drive, make sure that “Create default folders” is checked, then click on the button that says “Format USB”. Follow the prompts to format your drive.
- Now, within the formatted drive, you will see that there are folders created, for BIOS, Games, and RetroArch system files. Double-check that the drive has been formatted properly by right-clicking on the drive and selecting “Properties” and confirm that it has an NFTS file system. If it is NFTS, you are good to move to the next section.
- If the drive is still exFAT after running XboxMediaUSB tool, complete the following manual steps:
Manual USB drive setup:
Copy the BIOS/Games/RetroArch folders on your drive to your PC for safekeeping.
Right-click on the drive and select “Format” and choose NTFS file system, and leave the allocation size to Default. You can change the Volume Label (name of the drive) and make sure that “Quick Format” is checked. Press “Start” to format the drive.
Right-click on the newly-formatted drive and select “Properties” again. Click on the Security tab, the click on Advanced > Add > Select a Principal > Advanced > Find Now > ALL APPLICATION PACKAGES. Double click on ALL APPLICATION PACKAGES, then select “OK”, and then under the Basic Permissions header, select “Full control”. Select “OK”, then on the next window choose the check box “Replace all child object permission entries…” and click “OK” and confirm that you want to continue. You’ll get an error for the System Volume Information not being modifiable, just select “Continue”. If you would like to see a video walkthrough of the manual setup process, check out this video from Archades Games (timestamped to the location).
Move the BIOS/Games/RetroArch folders back to the drive.
Note that the first time you plug your drive into an Xbox, it will ask you if you want to set it up for media or games. Set it up for MEDIA.
Set up Remote Access
The easiest way to install emulators to your Xbox is from a PC using Remote Access.
- On your Xbox Dev Mode dashboard, you should see a Remote Access box. Navigate to the Remote Access Settings option, open it and make sure the “Enable Xbox Device Portal” box is checked.
- Also, make sure the “Require authentication to remotely access…” option is also checked. Choose “Set username and password” and create your credentials.
Now that we have Remote Access set up, we can now connect the Xbox to our PC to install apps.
- On the Xbox Dev Mode dashboard, make note of the Xbox IP address listed in the Remote Access box. It should look like https://192.168.1.###:11443 with the ### being a unique number for your Xbox.
- In a web browser, type the IP address in full and press ENTER. You will likely get a privacy error, just go through the prompts to allow the connection. Next, it will ask for your Remote Access login credentials, enter them here and select “Sign In”.
- This will bring you to the Device Portal where you can install apps. In the next step we’ll install the Safe Exit app as an example.
Safe Exit (return to Retail Mode)
UPDATE: as of July 2024, the Safe Exit app is no longer required. Now when leaving Dev Mode the “delete side loaded games and apps” option will be UNCHECKED by default. This should prevent any accidental deletions.
Once you have Dev Mode installed on your Xbox, you can easily swap between Dev Mode and the Retail Mode at will (it takes a minute or two when swapping between them). The default way to exit Dev Mode is to navigate to the “Leave Dev Mode” option on your Xbox Dev Mode dashboard; however, by default there is a checkmark for “Delete side loaded games and apps” that will delete all of your hard work if you forget to uncheck it when leaving Dev Mode. In order to prevent any accidental deletions, we are going to set up an app called Safe Exit.
- Head over to the Safe Exit releases page and download the latest SafeExitRelease.zip file. Note that when downloading the app, Google Drive may give a virus warning (but it appears to be safe regardless). Extract the zip file so that it is in .appx file format, with another folder within labelled as “Dependencies”.
- Once connected to the Xbox Device Portal in the section above, you will be taken to a “My games & apps” menu. Click on the “Add” button and then navigate to your Safe.Exit.Icon.appx file (you can also just drag and drop the file), then choose “Next”.
- On the next screen, add your three dependencies files by either navigating to it on your PC or dragging and dropping the files. Press “Start” to install everything.
- Once complete, select DONE and you should now see the Safe Exit app in your “My games and apps” list. Now, anytime you want to return to retail mode on your Xbox, just open up this Safe Exit app.
To re-enter Dev Mode, open the Xbox Dev Mode (DevKit Activation) app and reboot from the main Xbox interface.
Download and install RetroArch
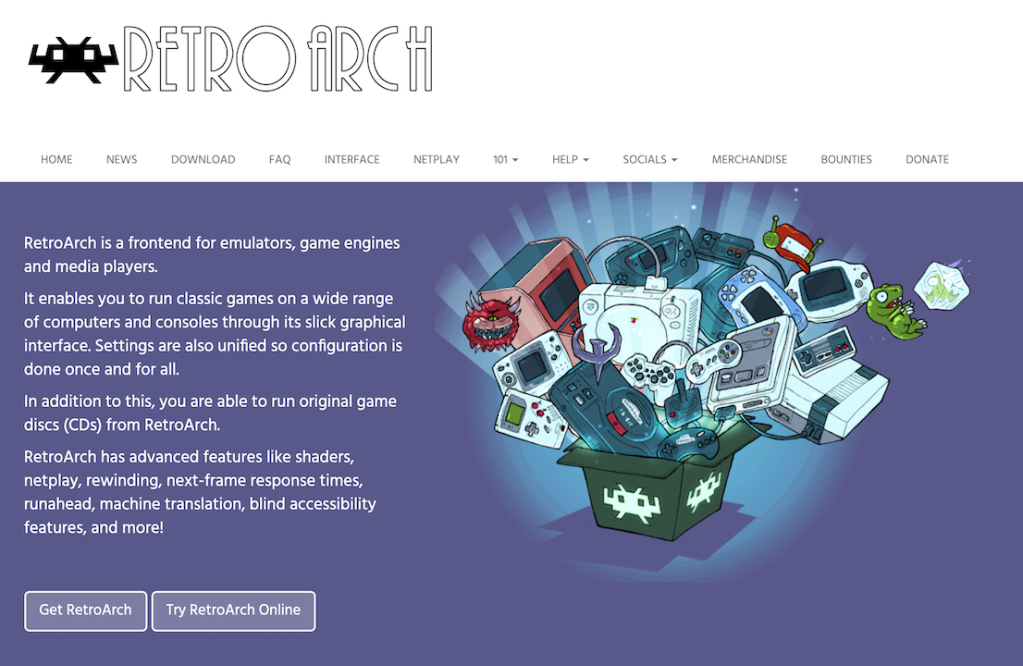
RetroArch is a powerful retro emulation frontend, that will allow you to play most classic systems with relative ease. It has a steep learning curve, so I recommend checking out my RetroArch starter guide in case you have any questions or get stuck.
- Head over to the RetroArch downloads page and navigate to the “Xbox Series/One” section. Download the latest UWP (it will be labeled as simply “Download”). Also download the Visual Studio Runtime Libraries (UWP) dependencies right below it.
- Once connected to the Xbox Device Portal in the section above, you will be taken to a “My games & apps” menu. Click on the “Add” button and then navigate to wherever you saved your RetroArch UWP file (you can also just drag and drop the file), then choose “Next”.
- Now add your dependencies file by either navigating to it on your PC or dragging and dropping the file. Press “Start” to install RetroArch and its dependencies.
- Once complete, select DONE and you should now see the RetroArch app in your “My games and apps” list.
Note: If your console freezes during installation, do a hard reboot of your Xbox and try again.
Set up RetroArch
- Back on your Xbox, under the “Games and Apps” header you should now see the RetroArch app. Hover over the app and press the back (SELECT) button and select “View Details” from the drop-down. Here, change the app type from “App” to “Game”, to give you more resources to run games with the best performance. If desired, reboot your Xbox to ensure the app type change will take effect.
- Launch the RetroArch app. At this point it will ask you to sign into your Microsoft account, use the same account that is associated with Dev Mode. Make sure your USB drive is inserted into your Xbox for this next step (set it to “Media” if prompted).
- RetroArch will launch as a barebones app, which needs some configuration:
- Go to Settings > Directory and change your system folders to the USB drive folders. The USB drive will be listed under the “E:” drive, and the RetroArch folders will be within the RetroArch directory. Here is a list of all the folders you will need to associate with the USB drive’s folders:
- assets, cheats, config, info, logs, overlays, playlists, saves, shaders, states, system, and thumbnails.
- As a reminder, the “system” folder is where your BIOS files are located (more on that in the next section). You can either put them in the RetroArch > System folder, or in the BIOS folder in the root directory of your USB drive. Regardless, make sure that RetroArch is pointed to the correct System/BIOS folder.
- Go to Main Menu > Online Updater > Update Assets to download and install fonts, backgrounds, etc.
- While still in the Online Updates section, also select these options: Update Core Info Files, Update Controller Profiles, Update Cheats, Update Databases, Update Overlays, and Update Slang Shaders.
- One quirk of RetroArch is that the installed N64 and Saturn cores works best, and updating them will break some features like upscaling. To prevent updates, go to Settings > Core > Manage Cores > mupen64plus_next_libretro.dll > Lock Installed Core. Do the same with the Parallel and Yabasanshiro cores. After that, you can go into Online Updater > Update Installed Cores to make sure you have the freshest cores. This will take a while that first time.
- Go to Main Menu > Settings > Drivers > Menu and select whatever Menu Driver (theme) you like. I prefer XMB, and I think it’s funny to show a PS3-style theme on an Xbox.
- Go to Main Menu > Settings > Hotkeys and adjust hotkeys to your liking. For a tutorial on setting up hotkeys, check out my RetroArch starter guide (there is a hotkeys section!).
- Go to Main Menu > Settings > User Interface > Menu Item Visibility and disable any menu items that you don’t need, such as Explore, Images, Music, Favorites, etc.
- Go to Settings > Directory and change your system folders to the USB drive folders. The USB drive will be listed under the “E:” drive, and the RetroArch folders will be within the RetroArch directory. Here is a list of all the folders you will need to associate with the USB drive’s folders:
- Once you have made your adjustments, go to Main Menu > Configuration File > Save Current Configuration to lock in your changes.
Adding BIOS and game files
Adding game files is a relatively painless process, you will want to plug your USB drive into a PC and then drag and drop your ROMs into their respective folder on the drive (found within the Games folder). If you are unsure which files to use within RetroArch, you can go to the Libretto docs page, and on the left menu you will see the Core Library: Emulation section, and you can choose your system and read more about which file types are necessary.
BIOS files are necessary system files for certain consoles to run properly. Examples of systems that will not run correctly without BIOS include PlayStation 1, PlayStation 2, GameBoy Advance, and Sega CD. BIOS files cannot be shared due to copyright, so you are on your own to dump them from the original console or to find backups via the internet.
Here is a list of recommended BIOS files for maximum gaming fun:
SEGA CD:
bios_CD_E.bin
bios_CD_J.bin
bios_CD_U.bin

FAMICOM DISK SYSTEM:
disksys.rom

GAME BOY (for boot logo):
gb_bios.bin

GAME BOY COLOR (for boot logo):
gbc_bios.bin

GAME BOY ADVANCE:
gba_bios.bin

NEO GEO:
neogeo.zip (placed in game directory)

PLAYSTATION:
scph1001.bin

PLAYSTATION 2:
see PS2 section

TURBOGRAFX-CD:
syscard1.pce
syscard2.pce
syscard3.pce
Once you have collected your BIOS files, you will want to add them to the System folder located on your flash drive in the RetroArch > System folder. Note that for PS2 we’ll cover that in the PS2 section.
Create games playlists
In order to easily navigate your games lists, I recommend setting up playlists. Check out my RetroArch starter guide where I walk you through this process. I recommend making manual playlists to ensure everything works properly.
Recommended RetroArch cores
Many systems have multiple RetroArch cores available. Here are the ones that I personally use:
Arcade (fighting games and CPS): FinalBurn Neo
Arcade (Neo Geo): FinalBurn Neo
Arcade (80s and 90s): MAME 2003-Plus through MAME - Current
Arcade (mid to late 90s): MAME 2010 or later
MS DOS: DOSBox-Pure
Panasonic 3DO: Opera
Atari Jaguar: Virtual Jaguar
Nintendo DS: melonDS
Nintendo GB: Gambatte
Nintendo GBC: Gambatte
Nintendo GBA: mGBA
Nintendo NES: Nestopia
Nintendo SNES: bsnes
Nintendo 64: Mupen64Plus-Next
Sega Game Gear: Genesis Plus GX
Sega Genesis: Genesis Plus GX
Sega CD: Genesis Plus GX
Sega 32x: Picodrive
Sega Saturn: Beetle (accurate but doesn't support upscaling)
Sega Dreamcast: Flycast
Sony PlayStation: SwanStation
Note that arcade gameplay is tricky. You need to have a matching romset for your core. Downloading individual arcade games from random sites and booting them into a core will likely result in crashes. Instead, find a romset that matches the core you want to use; I recommend “non-merged” romsets since that means each individual file will boot regardless of having any parent/clone zip files associated with it. MAME 2003-Plus is a good arcade core to start with.
Recommended RetroArch configurations
There are MANY ways to configure RetroArch, but here are a few of my favorite settings tweaks. Refer to my RetroArch starter guide for a baseline setup and understanding of how to configure this rather complex emulation frontend.
Shaders:
RetroArch has a robust shaders system, and several of them work well with the Xbox. In particular, CRT shaders can improve the look and feel of classic retro systems. Three in particular are my favorite:
CRT Aperture: this provides an even CRT effect with slightly muted colors, meant to mimic TVs such as a Sony PVM.
CRT Consumer: this CRT shader also provides deep colors and a slight curvature.
CRT Royale: this series of shaders are demanding but produce a high-quality image.
Individual configurations:
NES: These individual settings will balance the look and feel of NES games.
- Quick Menu > Core Options > Video > Mask Overscan (Left) = 8
- Quick Menu > Core Options > Video > Mask Overscan (Right) = 8
- Quick Menu > Core Options > Emulation Hacks > Remove Sprite Limit = ON
SNES: Aside from utilizing CRT shaders, some games can be used in widescreen mode.
Genesis: Some games can be played in widescreen using the Genesis Plus GX Wide core.
Dreamcast: To play games in widescreen, go to Quick Menu > Core Options > Emulation Hacks > Widescreen Cheats > ON.
Updating RetroArch
You may want to periodically update RetroArch, and if you have everything set up on your USB drive, the update process is relatively simple.
On your Xbox Dev Mode dashboard, hover over the RetroArch selection and press the SELECT/BACK button and choose “Uninstall”. Then download the latest version of RetroArch and its dependencies for Xbox from their website and re-install RetroArch via the Xbox Device Portal (demonstrated earlier in this guide). Once installed, press SELECT/BACK and “View Details” and associate the app as a game, like you did when first installing RetroArch.
Launch RetroArch and follow the initial setup steps again: update assets and other files, then go into your settings and re-associate your folders within the USB directory again (for things like BIOS, Thumbnails, etc.), and also set your hotkeys, and so on (detailed earlier in the guide). Be sure to Save Current Configuration to keep all those settings, then restart RetroArch.
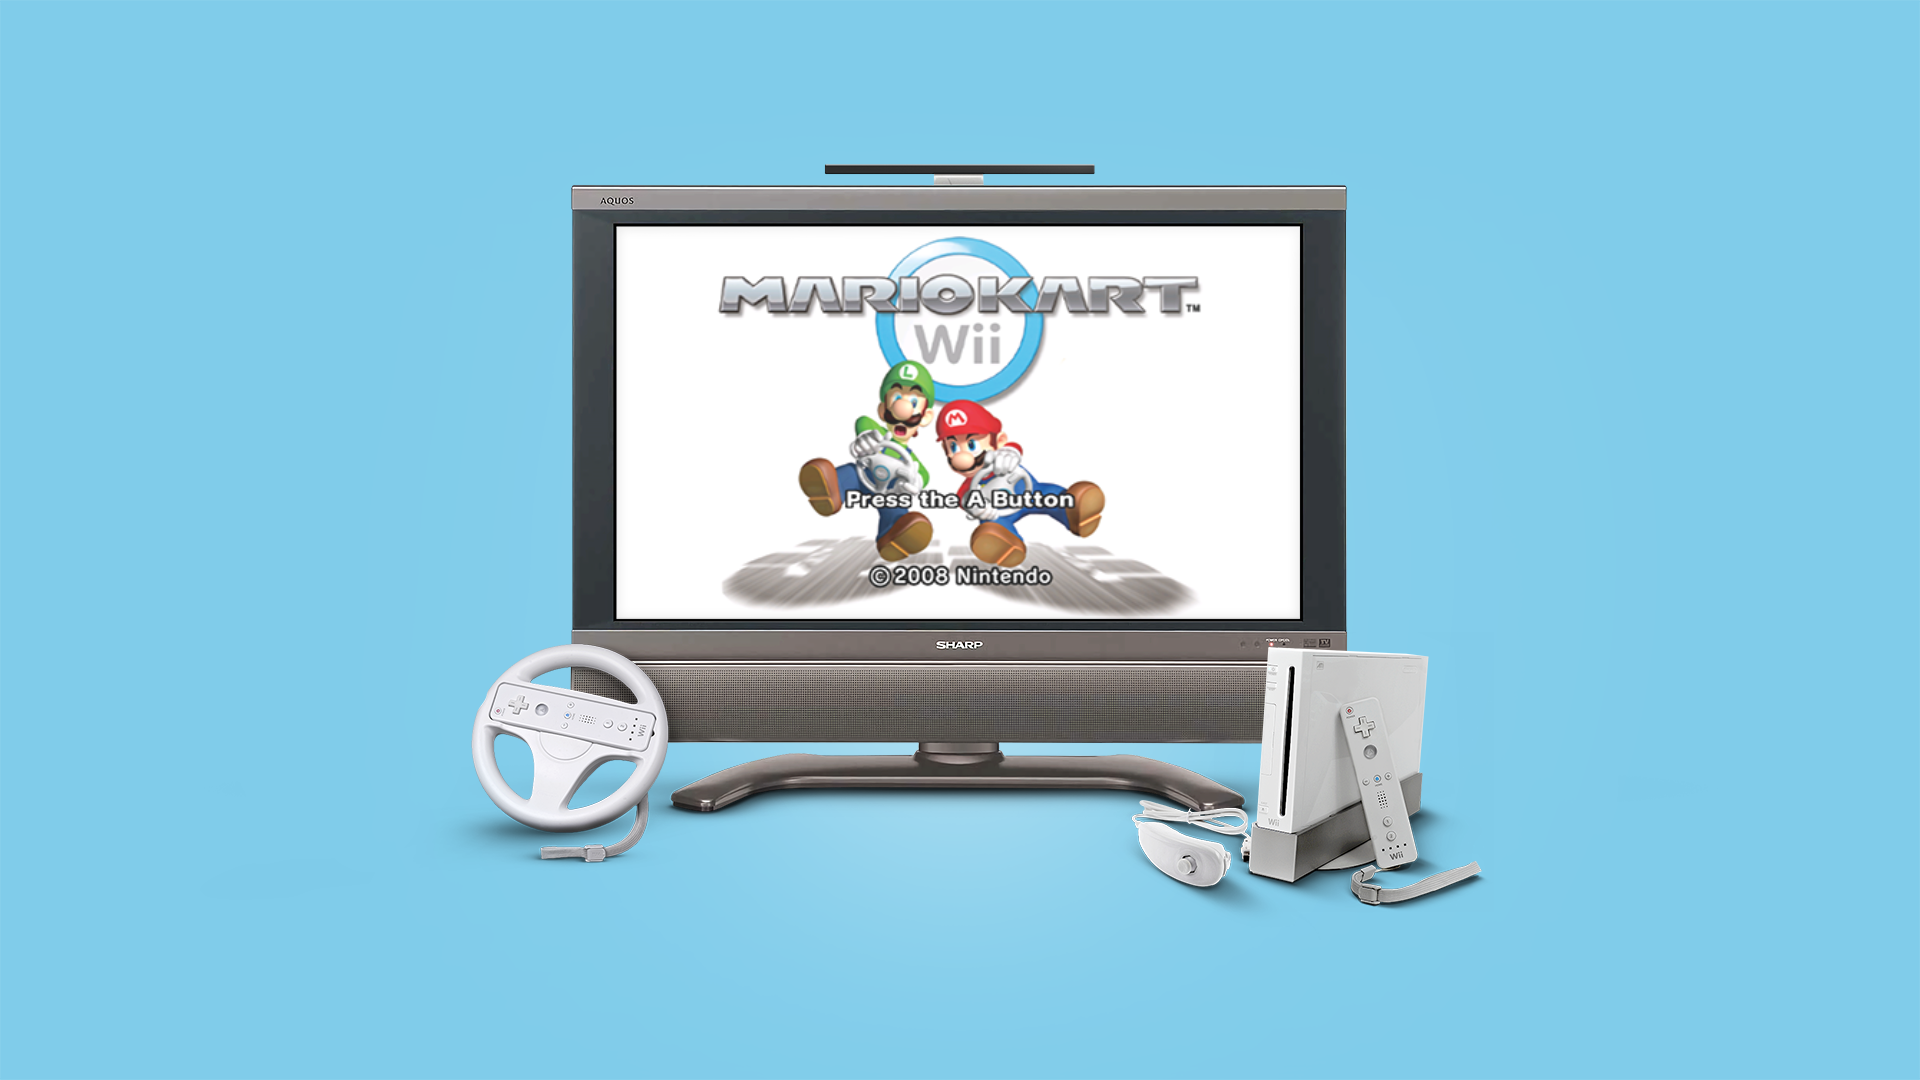
Nintendo GameCube and Wii
Recommended app: Dolphin UWP (standalone)
BIOS: not required
Dolphin is an emulator that allows you to play GameCube, Wii, WiiWare, and Wii Virtual Console games. These games do not require BIOS files to run. There is a RetroArch Dolphin core but it requires a lot more pre-configuration, so I recommend using the standalone emulator. Special thanks to SirMangler for porting the standalone emulator to work with Xbox Dev Mode; if you have the means, please consider buying them a coffee for all of their hard work.
- Head over to the Dolphin UWP releases page and download the latest appx file.
- Once connected to the Xbox Device Portal on your PC, you will be taken to a “My games & apps” menu. Click on the “Add” button and then navigate to wherever you saved your Dolphin UWP file (you can also just drag and drop the file), then choose “Next” and “Start”. The installation will commence.
- Back on your Xbox, under the “Games and Apps” header you should now see the Dolphin app. Hover over the app and press the back (SELECT) button and select “View Details” from the drop-down. Here, change the app type from “App” to “Game”, to give you more resources to run games with the best performance.
- Remove your USB drive from the Xbox and plug it into your PC. In the main/root directory, create a folder named “Dolphin”. This folder will be used to store system files (saves, etc).
- On the USB drive, add your GameCube and Wii games to their subfolders within the Games folder. GameCube games should be in ISO, GCM, GCZ, and RVZ file formats, and multi-disk games should be collected into their own subfolder. Wii games should be in ISO or WBFS format, although WBFS files have been known to cause issues.
- Re-insert the USB drive into your Xbox, then open up the Dolphin app. Press START to bring up settings, and navigate to Paths > Set Dolphin User Folder Location. In the new window, navigate to the USB icon and choose the Dolphin folder we created earlier. Once set, exit the app by pressing the Xbox icon and quitting Dolphin.
- Open Dolphin again, and then press START to bring up the settings and navigate to Paths > Add Path and navigate to your GameCube folder. Repeat this process for Wii games (and WiiWare, etc). Press the B button and wait for the games list to populate. The list will be a little slow when you first scroll through everything, but it will get better once everything has cached. Use the Left and Right bumper to cycle through GameCube and Wii games.
- If you would like, you can press START and change the graphics scaling for upscaled resolution, etc. 3x resolution will equate to 1080p for 3D-rendered objects.
- When playing a game, click L3 + R3 to bring up an in-game Quick Menu. Here you can change discs, adjust graphics settings, and save/load states. Additionally, you can change controller profiles while playing Wii games. To do so, go to Quick Menu > Options > Controls > Wii and change the Wiimote port 1 profile to Wiimote + Nunchuck, Classic Controller, or Sideways Wiimote.
For more in-depth coverage (like netplay, custom controller profiles, and HD texture packs,) check out Archades Games’ YouTube playlist.

Sony PlayStation Portable
Recommended app: PPSSPP UWP (standalone)
BIOS: not required
PPSSPP is a Sony PSP emulator. It’s available both as a standalone app and within RetroArch as an emulation core. Either works fine: the standalone version is more intuitive and requires less configuration out of the box, but the RetroArch version takes advantage of universal hotkeys. In this guide I’ll show you how to set up each.
PPSSPP standalone setup:
- To download the latest port of PPSSPP, you will need to join the Xbox Emulation Hub discord server and find the file within their “dev-announcements” channel (the file will be in msix format, and the post is dated 26AUG2023).
- Once connected to the Xbox Device Portal on your PC, you will be taken to a “My games & apps” menu. Click on the “Add” button and then navigate to wherever you saved your PPSSPP UWP file (you can also just drag and drop the file), then follow the prompts to complete the installation.
- Back on your Xbox, under the “Games and Apps” header you should now see the PPSSPP Gold app. Hover over the app and press the back (SELECT) button and select “View Details” from the drop-down. Here, change the app type from “App” to “Game”, to give you more resources to run games with the best performance.
- Remove the USB drive from your Xbox and insert it into your PC. On the main/root directory, create a folder named PPSSPP. Also, add your PSP games to the Games > PSP folder on your USB drive. Games should be in ISO, CISO, or PBP file format. Eject your USB drive and re-insert it into your Xbox.
- Start up the PPSSPP Gold app, and it will ask you to create/choose a PSP folder. Select this option, navigate to your USB icon, and find the PPSSPP folder you created in the last step. This will store all of your system files (saves, etc) onto the USB drive.
- On the main PPSSPP screen, navigate to the Games tab and press the Up arrow repeatedly until you are in the root directory of the Xbox. Choose the E: drive > Games > PSP. Now all your games will appear, navigate to the “+” icon below the games and press A to save that location. You’re now ready to start up your PSP games.
- While in a game, press the Left Trigger button to bring up the PSP menu to save your state, or change out for another game. Press the Right Trigger button to initiate a fast-forward.
RetroArch setup:
- Click on this link to download the PPSSPP master assets file directly from the developer. Unzip this file and insert your USB drive into your PC. Navigate to the BIOS folder on your USB drive (or wherever you’ve pointed RetroArch to as your System/BIOS folder) and add the PPSSPP folder. Next, add your games to the Games > PSP folder on the USB drive.
Configuration tips:
- In the PSP Quick Menu > Options section, consider the following options:
- Internal Resolution: Xbox Series S/X consoles can likely upscale to at least 4K resolutions, so feel free to adjust these settings as high as your display can manage. Note that you will need to restart the content every time you adjust the internal resolution.
- Confirmation: set between Cross or Circle based on personal preference
- Anisotropic filtering: keep it OFF to prevent crashing.
- Spline/Bezier curves quality: set to HIGH
- Duplicate frames in 30Hz games: set to ON for smoother gameplay
- Texture Scaling Level: set to higher values for more texture quality (up to 5) based on personal preference
- Texture Scaling Type: can be adjusted based on personal preference
- Texture Deposterize: turn on if upscaling, it will smooth out the image
Note that sometimes PPSSPP on RetroArch will revert your video driver to “gl”. To fix this, go into Main Menu > Settings > Video > Drivers and make sure that “d3d11” is selected as the video driver.
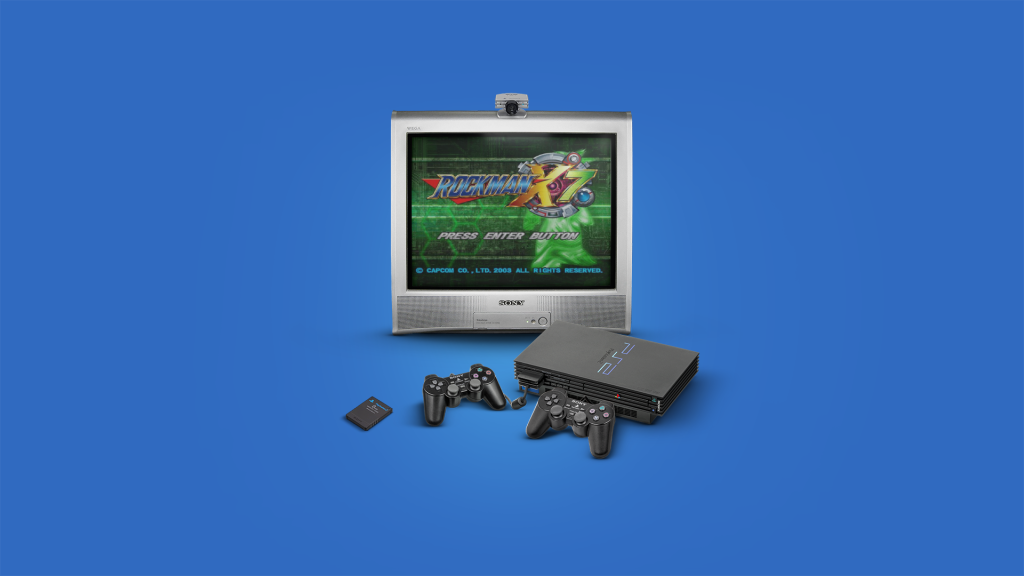
Sony PlayStation 2
Recommended app: XBSX2.0 UWP (standalone)
BIOS: required (dump your own)
XBSX2.0 is a port of the PCSX2 emulator, which will allow us to play PS2 games on Xbox consoles. These games DO require BIOS files to run. There is a RetroArch Dolphin core but it requires a lot more pre-configuration, so I recommend using the standalone emulator. Special thanks to SirMangler for porting the standalone emulator to work with Xbox Dev Mode; if you have the means, please consider buying them a coffee for all of their hard work.
- Head over to the XBSX2.0 UWP releases page and download the latest appx file. Note that if you are using the Xbox One, you will want to download the Universal version available on the Dev Mode Store.
- Once connected to the Xbox Device Portal on your PC, you will be taken to a “My games & apps” menu. Click on the “Add” button and then navigate to wherever you saved your XBSX2 UWP file (you can also just drag and drop the file), then choose “Next” and “Start”. The installation will commence.
- Back on your Xbox, under the “Games and Apps” header you should now see the XBSX2.0 app. Hover over the app and press the back (SELECT) button and select “View Details” from the drop-down. Here, change the app type from “App” to “Game”, to give you more resources to run games with the best performance.
- Remove your USB drive from the Xbox and plug it into your PC. In the main/root directory, create a folder named “XBSX2” or whatever you’d like. This folder will be used to store system files (saves, etc). Within the new folder, make subfolders named: BIOS, Saves, Save States, Covers, Game Settings, Input Profile, Cheats, Widescreen Cheats, No-Interlace Cheats, Texture Replacements
- Within the BIOS folder, add your PS2 BIOS files. These are copyrighted files and won’t be shared in this guide. However, it is very easy to source your own by extracting them from PS3 system files provided by Sony by following this guide.:
- Next, add your PS2 games to the Games > PS2 folder on your USB drive. Files can be in ISO, BIN/CUE, or CHD format. I recommend CHD format because it will save space, and here is my guide on setting them up:
- Re-insert your USB drive into the Xbox, and start up the XBSX2.0 app. To start, go to the Game List menu and press the Right Bumper twice to get into Settings, and select “Add Search Directory”. Select “Parent Directory a few times until you get to the drive letters, then choose E: > Games > PS2 or wherever you stored your games, then select “Use this Directory”.
- Back on the main menu, select Settings and press the Right Bumper to tab over to BIOS settings. Like with the Game List step above, navigate to E: > XBSX2 > BIOS and choose your BIOS directory. Then, go to BIOS Selection and choose your BIOS file (if you have more than one added to the folder). Region doesn’t matter, as long as you keep the “Fast Boot” option is checked.
- Next, let’s configure all our other directory settings. Press the Right Bumper to tab over to the Memory Card Settings, and then under Memory Card Directory, navigate to E: > XBSX2 > Saves. Finally, tab over to the Folder Settings menu, and here do the same navigation for the following folders: Save States, Covers, Game Settings, Input Profile, Cheats, Widescreen Cheats, No-Interlace Cheats, Texture Replacements. Once all of them are adjusted, restart XBSX2 by pressing the Xbox button and closing the app.
- While a game is running, you can press SELECT + START to bring up a Quick Menu to make adjustments on the fly. By default, games will run in 3x resolution (1080p).
For more in-depth coverage (like hotkeys, multiplayer, cheats, netplay, and HD texture packs), check out Archades Games’ YouTube playlist.
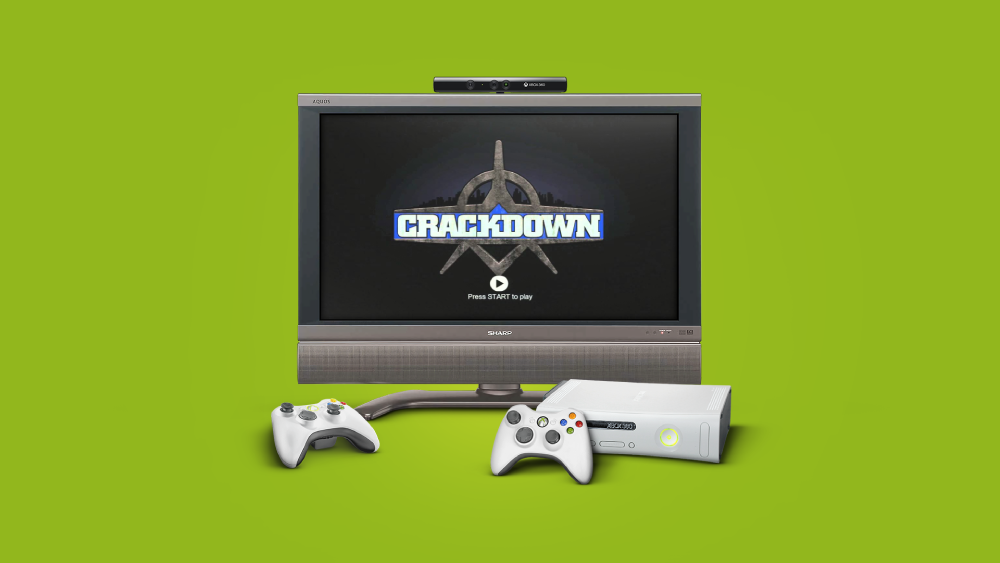
Xbox 360
Recommended app: Xenia Canary (standalone)
BIOS: not required
It might sounds counter-intuitive, but yes there is an Xbox 360 emulator for the Xbox consoles. This is handy if your favorite game isn’t backwards compatible with your Xbox, or if you want to dump and emulate your 360 discs to play on an Xbox that doesn’t have a disc drive. To dump your Xbox 360 discs, check out my guide.
Xenia Canary is the Xbox 360 emulator we’ll be using in this guide — note that ISO format games are not supported, they will need to be in XEX or GOD format. You can use a tool like Extract-ISO to extract an ISO into XEX file format. Simply download that release, extract the exe file, and then place the exe file in the same folder as your ISO files. Drag and drop each ISO file onto the exe file to convert them.
If you have an Xbox 360, dumping your games (both on disc and digital) is super easy. Here is my guide for getting that set up:
Finally, bear in mind that Xenia Canary is still under development, so game compatibility is not perfect. Many Xbox 360 games simply aren’t compatible or optimized for this emulator yet. Special thanks to SirMangler for porting the standalone emulator to work with Xbox Dev Mode; if you have the means, please consider buying them a coffee for all of their hard work.
- Head over to the Xenia Canary UWP releases page and download the latest appx file.
- Once connected to the Xbox Device Portal on your PC, you will be taken to a “My games & apps” menu. Click on the “Add” button and then navigate to wherever you saved your Xenia Canary UWP file (you can also just drag and drop the file), then choose “Next” and “Start”. The installation will commence.
- Back on your Xbox, under the “Games and Apps” header you should now see the Xenia Canary app. Hover over the app and press the back (SELECT) button and select “View Details” from the drop-down. Here, change the app type from “App” to “Game”, to give you more resources to run games with the best performance.
- Remove your USB drive from the Xbox and plug it into your PC. In the main/root directory, create a folder named “Xenia” or whatever you’d like. This folder will be used to store system files (saves, etc). Next, add your Xbox 360 game files to the Games > Xbox 360 folder on your USB drive.
- Re-insert your USB drive into the Xbox, and start up the Xenia Canary app. Tab over to the Paths tab, and select “Set Config Folders Path” and set it to E: > Xenia (or whatever you named it). Restart Xenia Canary by pressing the Xbox button and closing the app.
- Once back in the app, tab back over to Paths and select “Add Paths”, and navigate to E: > Games > Xbox 360 and choose “Select”. It might take a while to load your games list, and you will see a bunch of non-game files, making it difficult to navigate the GUI. XBLA games will appear as a series of numbers and letters, and you’ll have to hunt through the list to find the title.
For more in-depth coverage (like installing DLC), check out Archades Games’ YouTube playlist.
Changelog
03AUG2024
– added note about Safe Exit no longer being required due to changes to the Dev Mode dashboard
– added note about the Safe Exit app being flagged as a virus by Google Drive (but appears to be safe)
01SEP2023
– added note about 2FA when setting up a test account on your Dev Mode dashboard
30AUG2023
– updated location of PPSSPP emulator. It’s currently only available through the Xbox Emulation Hub discord server.
28AUG2023
– added RetroArch configuration recommendations
26AUG2023
– rewrote RetroArch guide
– rewrote GC/Wii guide
– rewrote PSP guide
– rewrote PS2 guide
– added Xbox 360 guide
25AUG2023
– preliminary re-write of guide (up through Device Portal instructions)
23AUG2023
– updated dev mode signup link
16SEP2021
– added updated PS2 core courtesy of Archades games
12SEP2021
– added clarifying info re: Playlist scanning
11SEP2021
– published guide

Can I use a Mac instead of a Win Computer?
LikeLike
Everything goes exactly as described except the .dat file for Mame for me. Download of file works, placed it in “game” folder I created and uses to create all my playlists. However, when I navigate to the folder to assign .dat file it does not show, only my game folders.
LikeLike
Finally got the .dat to work. After downloading the file I changed .dat to .xml and it was visible and able to be selected.
LikeLike
Tried this with my X One X. Not sure it’s worth the effort and the small fee because of the storage stuff and updating RA hassles. Oh and whilst in Dev mode my Xbox kept starting up after I shut it down!!! Once I exited Dev mode the thing stayed shut off.
LikeLike
Bought a Series S and a Dev account to do this. I follow the steps exactly and it will not work for me.
I’ve tried it lots of times. No idea why but I’m so annoyed I wasted all that money.
LikeLike
Does it says that your console need to update?
LikeLiked by 1 person
no problem here following the guide, must be you
LikeLike
I did everything correct but now when i plug in my external hard drive it won’t show up on Retroarch for me to load up games. I formatted it twice and it still won’t load.
LikeLike
Bro, it’s literally $19. That’s not “all that money” if you NEED help hit my gamertag nykomononoke and I can try to help ya depending on what you wanna do.
LikeLike
Hi Reeee, Im stuck on the part where you’re supposed to Reconfigure RetroArch directories
Go to Main Menu > Settings > Directory and choose one of the directories to change, let’s start with BIOS.
Navigate to S: > Program Files > WindowsApps > (really long RetroArch folder name) > System > Use This Directory
When I go to settings>directory>Bios>S: I only have “Parent Directory” ” ” and “no items”
I dont have any of the other options on the guide.
LikeLike
Dunno if this will help, but sometimes the “+” button [where you enter the code from your Xbox] is invisible. Click the top right of the white box
LikeLike
Can I use with my account online in Dev Mode?
LikeLike
You do not get to use retail games. But can be in a party yes.
LikeLike
So I did this last night and everything was fine and as I was downloading a game I fell asleep and I woke up to my Xbox having no signal on the tv is there anything that I probably did ? I tried replacing HDMI and I tried cleaning the ports and even tried to put it in low resolution mode but nothing my Xbox turns on and the remote connects but no signal on tv someone please help!!!
LikeLike
After entering the 6 digit code my console says ”Almost there, your console need to update”
Nothing happens, my console is listed in my developer account but the console stays forever with the message and never activates or even asks to reboot. It’s been 6 months now…
LikeLike
Hey man, you need to go to Settings->System->Console Info and once you are in there press in the following order LB->RB->LT->RT. This will enable you to access developer settings. Once you are in there there is an option to restart the console in developer mode.
LikeLike
Activate dev mode through the hidden developer settings menu rather than the dev mode activation app. To access the hidden menu go to Settings > System > Console Info > Press LB RB LT RT > Developer Settings > Developer Mode
That worked for me… Press LB RB LT RT all together and a quick press and release…
LikeLike
Awesome video! But having some drama running cores keeps coming up as lfailed to open libretro core have tried multiple games on n64 but still won’t load what or how do I fix this can’t find anything useful on the internet
LikeLike
When i go to retroarch to point it’s directories to the new folders i made it has no items under S:\ (though just scrolling down, and cores seems to be pointing to some folders under the S:\ drive, though once again when i go into cores and look under S:\ there is nothing to point to)
LikeLike
Same here I cant figure out why, plz help.
LikeLike
I’m having the same issue, I looked on the other drives as well, but I couldn’t find any folder to point to. The only one that seems to have files is D:\, but the program files where Retroarch should be is not there…
If I come up with a solution, I’ll let you guys know
LikeLike
Solved! The retroarch folder was on D:\DevelopmentFiles\WindowsApps\
And then, inside the retroarch folder you can find the folders you created and you can point to them. Check out if your installation is also there. Hope I helped!
LikeLike
Congrats on finding a substitute that worked for you. The files are in drive S you need to update a specific part of RetroArch in the app and it will show you everything in all drives.
LikeLike
Oh Jesus Christ, I spent 5 hours trying to find this answer. I went through the list of drives opening all of them, but seem to have missed every one but the D drive.
LikeLike
Then you didn’t follow the very clear and concise tutorial. It states early on that you have to update a lot of things, and after updating one of those things you can finally see the contents of the S drive.
LikeLike
Hi, so I got stuck pretty early in this.
I have a Xbox one s (digital version) and I signed up, downloaded the app went thru the prompts and entered code and shows up good online as active for my account.
But, on the Xbox it went thru the activate console part and now says “Almost There: you’re almost ready for development, but first we need to update your Xbox. After the update, come back to this app and you’ll be able to switch to developer mode. (Close)”.
Close is the only option and I don’t see any progress bar anywhere(no updates for system available either), not sure if I did something wrong or what.
Please and thank you if anyone can provide assistance, for now I’m gonna probably just leave my box on to see if it does anything.
LikeLike
Did you ever get a reply for the set-up Duper? I had the same problem and was able to get Microsoft to help me through this. It only took about a week to get the right answer
LikeLike
Retroarch splash page opens then crashes. “Sorry, that didn’t work for some reason. (0x80070002)
LikeLike
Hi, sorry that you got no replies! I had this error and simply had to uninstall and reinstall the app to the Xbox. Hope this helps!
LikeLike
Needs RPCS3 support now that RPCS3 fully works with two thirds of the PS3 library.
LikeLike
How i get the Bezels from the Bezels Project displayed in Xbox Retroarch from USB?
LikeLike
so ive followed step for step multiple times and still have three issues.
1. still no S/ drive data even after updating everything
2. I cant view the files on my pc everytime i do the \\Xbox/IP it just does nothing
3. i cant resolve either issue even though i just wiped all files off xbox and pc and restarted at square 1 other than buying the license again. can some please help lol.
LikeLike
Hey champ, thanks for putting in all this effort. But you really need to update this thing sometime. Many of the steps are well out of date.
LikeLike
big quote
LikeLike
PPSSPP Github page isn’t working; shows Not Found
LikeLike
Thanks Mike! I’ve fixed it now.
LikeLike
This is amazing – thank you! One thing to note, on this part “On the main Dev Mode dashboard, you will see a box on the right called “Test Accounts”. here, click. on “Add Existing”, and add your Microsoft account credentials” – if you have 2 factor authentication turned on for your Microsoft account, the login attempt will fail. You have to go to your PC, log in to your account at live.com, go to “Security,” then “Additional security,” then under “Two-step verification” click “Turn off.” Then go back to the Xbox and add the Test Account, then go back to PC and turn 2FA back on. Hope this helps.
LikeLike
Thanks Brian, I’ll get a note added to account for 2FA!
LikeLike
can we install an Xbox original emulator this way?
LikeLike
Hi Russ, love your content and you as a trusted authority… I picked up a Series S on sale at Costco recently and am looking to apply this guide. I saw a YT guide from June of this year by ReveriePass that began with a warning to leave the XBox Insider Previews program before starting or you could have an error. It may have been patched since then or perhaps that program is too obscure, but I was wondering if it’s still relevant today?
LikeLike
Everything went well until I booted my first rom. I’m getting the failed to open the libretro core. Nothing works unfortunately. What do?
LikeLike
Hi Russ, do you know if the microsoft store sign up is still working? I’ve been having some payment issues and I see other people (from other countries) with the same issue as me, including someone from the US.
I’m just looking to find someone who can confirm that this worked in the last couple of months
LikeLike
Ok so followed the guide to a T and the only thing not working is my usb stick not showing in the retro arch directory? Ad it working fine in retail mode before it got cancelled.
LikeLike
Thanks for all these guides, really ! Me, I’m only on Xbox One X, and I succeeded with XBSX2 and RetroArch to work in my console, but unfortunatly not with Dolphin and Xenia, I got an error message with the first one, and a black screen with Xenia, this with several versions. Does anybody know why these two does not work ?
LikeLike
Please update some info… just found this now and it keeps on getting stuck at the directory part… Please help
LikeLike
I’ve already got emulation working on the Steam Deck (and very nice it is too). So I figured for convenience it would be great to also have it on my Series X. But looking at these comments (and the age of them), there is this niggle in the back of my mind that there are lots of pitfalls. This is why I put off doing this all last year, but got a Steam Deck at Christmas and took the plunge (the most painful and time-consuming part is finding the roms – I made the mistake of using Internet Archive, which is full of SLOW downloads and incomplete torrents).
LikeLike
The link for the PPSSPP UWP discord is no longer valid. Any alternative means to get this UWP?
LikeLike
Same here as post above, having issues with the ppsspp uwp.
LikeLike
Hi, just thought I’d post to say if you’re having trouble formatting a USB drive with XboxMediaUsb tool (hanging formatting forever), try to format the drive with Windows first (NTFS default block size) and then run the XboxMediaUsb tool and it will complete the set up and create the retroarch folders.
I have a lot of testing and configuring left so I’ll update this post if it turns out wrong.
I’m also interested in what the current ppsspp UWP project for early 2024 is…
LikeLike
does this still work for Xbox series x? I’m not trying to spend my money on this if it’s not up to date and actually working. I’d love to go back and play all the Pokémon games again
LikeLike
Hi guys, I’m at the point where I set up remote access, but after typing my address (which only has 2 digits instead of ###) I get a “Hmmm… can’t reach this page192.168.1.xx took too long to respond” message. I’ve been trying stuff on different browsers but it’s the same everywhere. I’m stumped. I haven’t setup my flash drive yet, but I’ve tried and the first time I plugged it in I got a msg to DL the xbox media player so I did, but now when plugging it in I get a “media storage ready. hold home button etc” and when I do that I just get an “error not found” in dev mode. In regular mode it opens and asks to play all with the list of bios, retroarch, etc. Frustrated would be a minor way to put it lol. Help please and thanks
LikeLike
Not getting to link my Xbox to the computer IP address
LikeLike
Thank you for this! Saved me a heap of time. All the Best
LikeLike
N64 and Dreamcast don’t work and half of my ps1 games wont load either. its fine i guess have a few games but this is a huge pain to do, thanks for the guide though.
LikeLike
Hey Russ, the PPSSPP link still isn’t working. Is there another way to access this UWP?
LikeLike
Cant sign up for developer account without a website. Is there a workaround?
LikeLike
hey I followed your instructions and locked the n64 cores but they seem to fail still. Any thoughts?
LikeLike
hi new to this would the crucial x9 4tb ssd work
LikeLike